
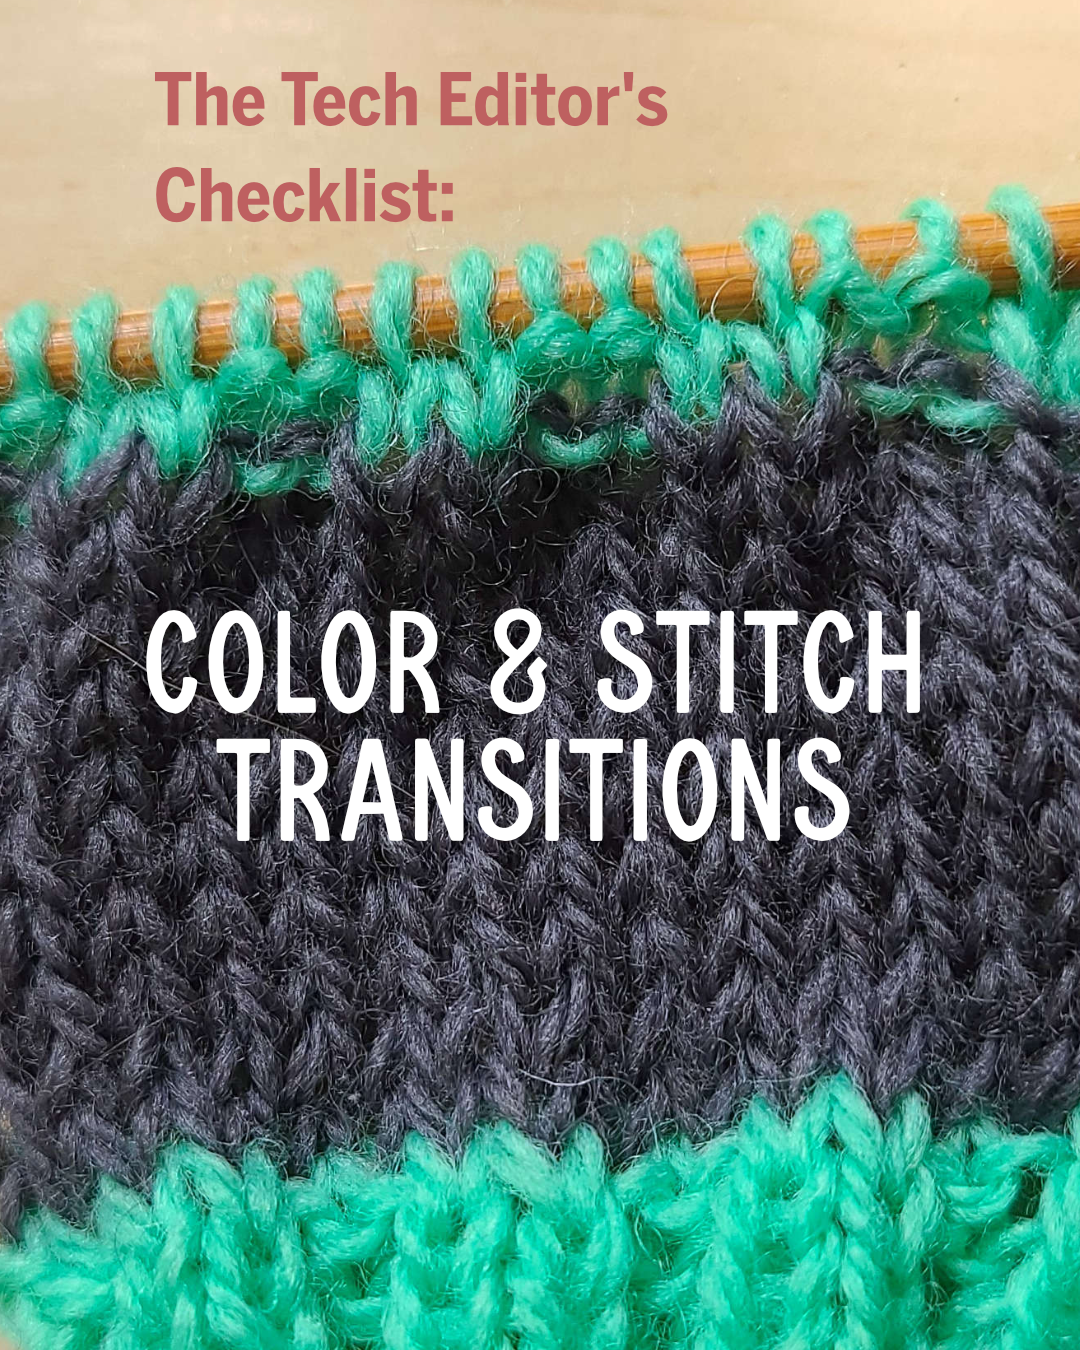
Contrast Color Trims and Transitions
In this series we do a deep dive into items I check for in every pattern I edit, the most common issues I see, and how to correct for them.
Despite being in the Tech Editor’s Handbook series, the inspiration for this post was a personal knitting project. I decided to add contrast color trim to an otherwise simple, mostly stockinette sweater, but when I went to add the trim, I ran into an issue. I really wanted a clean, straight line transition between the body yarn and the contrast color, but the pattern called for twisted rib trim. This meant that to get that clean edge, I had to do a little prep work first.
If you’re adding a constrast color trim or doing any kind of color blocking where the stitch and color change simultaneously, you may want to take a different approach depending on which direction you’re knitting (top down vs bottom up) and sometimes, if you’re knitting flat vs. in the round. As a tech editor, if a pattern has a designed contrast trim or color blocking that occurs simultaneously with a stitch pattern change, I always check to make sure the written instructions around these transitions will result in a look that matches any photos the designer has given me. But when you’re adding contrast trims or color blocking on your own, you have to add any setup rows in yourself.
In this post we’ll look at the stitch patterns most commonly used in trims – rib, twisted rib, and garter stitch, and how to set up color transitions in both bottom up and top down construction to get the look you want.
One quick note: For simplicity I’m going to use the sweater notations of bottom-up and top-down throughout, but it’s important to note that these tips will work for hats, socks, or other garments. However, when thinking about socks, remember that in a cuff-down sock, the fabric moves the same direction as a bottom up sweater, and in a toe-up sock the fabric moves the same direction as a top-down sweater. Another way to think about it is that bottom-up/cuff-down transitions from trim to body and top-down/toe-up transitions from body to trim.
Standard Rib
A bottom up standard rib sweater is one of the most common contrast color transitions and also the easiest. You work the rib in a contrast color first, ending on a WS row (or any row if you’re in the round) and then start with a stockinette row in the main color, with no additional transition needed.
However, if you’re knitting a top down sweater, transitioning from the main color stockinette to the rib is a bit trickier. If you just go straight from stockinette on the WS (or in the round) to a ribbing row, you will see some contrast color purl bumps appear.

You can see here how clean the bottom-up version is versus the top-down.
To get a clean transition from stockinette to rib, you should work one row of the contrast color in stockinette before starting the rib to get a transition that matches the bottom up. This can be worked either as a RS or WS row; I usually work the last WS body row in the contrast color and then work the length of ribbing (or number of rows) called for in the pattern.

There’s almost no difference between the look of these two methods.
Twisted Rib
Twisted rib can be worked the same as standard rib and it won’t look terrible, but you will notice a little more of a wavy transition between colors, particularly in the top-down construction. If you want a truly clean color change line, you need to add an extra set up row. In bottom-up, you’d finish the rib and work one final contrast color row/rounds in stockinette before continuing on in the main color; in top-down you would work two rows/rounds of the contrast color in stockinette before starting the twisted rib. This extra row counteracts the extra warping twisted rib puts on the fabric and makes the edge a bit sharper.

YMMV on the bottom up twisted rib but you can clearly see that for top down the 2nd set up row creates an edge more comparable to the standard rib swatch.
Garter Stitch
Garter stitch color transitions are a bit more complicated. For starters, there are big differences between the required setups in flat construction vs. in the round. Additionally, there’s an aesthetic choice involved -- while some knitters want a clean edge, others intentionally decide to include the contrast color “bump” row as a design detail.
Whether you are doing a garter stitch edge trim or adding a contrast color garter stitch stripe within the body of a garment, the instructions below cover both the clean and “bump” transitions in flat and in the round construction.
Garter Stitch Worked Flat
Working flat, it is not important whether you are working bottom-up or top-down. For either direction, you can get a clean edge as long as the first row of the color change matches up with the stockinette pattern. This means you work either a right side knit or wrong side purl row – for bottom up you do this on the first row of the main color and for top down, you do this on the first row of the contrast color.
To get a visible “bump” row, you do the opposite – the first color change row should be reverse stockinette (a WS K or RS P row).
After that first row you continue in whatever stitch pattern is assigned to that color.
Garter Stitch In the Round
Working in the round, where garter stitch is alternate knit and purl rows, you need to pay attention to which type of stitch (K or P) you are working in garter.
In bottom up, you should end the garter section on a purl row to get the best results. For a clean edge, you would then follow the purl garter row with a knit main color row. For a visible purl bump, it’s a little counterintuitive – you follow a purl contrast color garter row with a purl main color row before continuing in stockinette.
For top down it’s a bit simpler – for a clean edge, you start with a knit garter row, and for a visible bump, start with a purl garter row.

Garter stitch transitions are cool, but just a little bit more complicated if you want that bump row.
I’ll be honest here, one of the main reasons I wrote this post up is so *I* can reference it as necessary (trying to remember garter stitch in the round transitions in particular melts my brain sometimes). Feel free to bookmark this post and refer back to it the next time you want to introduce a contrast color to your knitting!
Never miss a blog post - sign up for the newsletter and get a monthly digest of recent posts straight to your inbox!


I’m Whitney, a tech editor, graphic designer, and lifelong crafter. Join me for an exploration of my latest knitting, crochet, sewing, and upcycling projects, tips on knitting technique, editing tips for knitting designers, and more!