
The Stitch Marker Method for Attaching Buttons
I recently needed to fix some badly misaligned buttons on a store-bought pajama top (we’re talking almost a half inch off from some of the buttonholes), and I realized that I could use the same method for attaching buttons on a woven fabric garment that I use when I’m attaching them to a handknit.
When I learned how to sew buttons on fabric shirts, I was taught to mark button placement with straight pins, but I hated using them – I’m prone to stabbing myself on them, and they often slipped out of slippery fabric while I was trying to get the button lined up. The solution revealed itself when I started sewing buttons on handknits: removable stitch markers and/or safety pins, which solve both the accidental stabbing and the slipping. This is my favorite method for attaching buttons and keeping them aligned with the buttonholes.
You will need:
Sewing thread and a needle that fits through your button. If the yarn from your sweater will fit, go for it, but I find I usually need smaller thread and a smaller needle.
Removable stitch markers. If you’re working with woven fabric, you will need the stitch markers that are made from coil-less safety pins, or you could also use regular coiled safety pins (don’t use the coiled safety pins on handknits, though, as they might snag the yarn). You will need one stitch marker for every buttonhole.
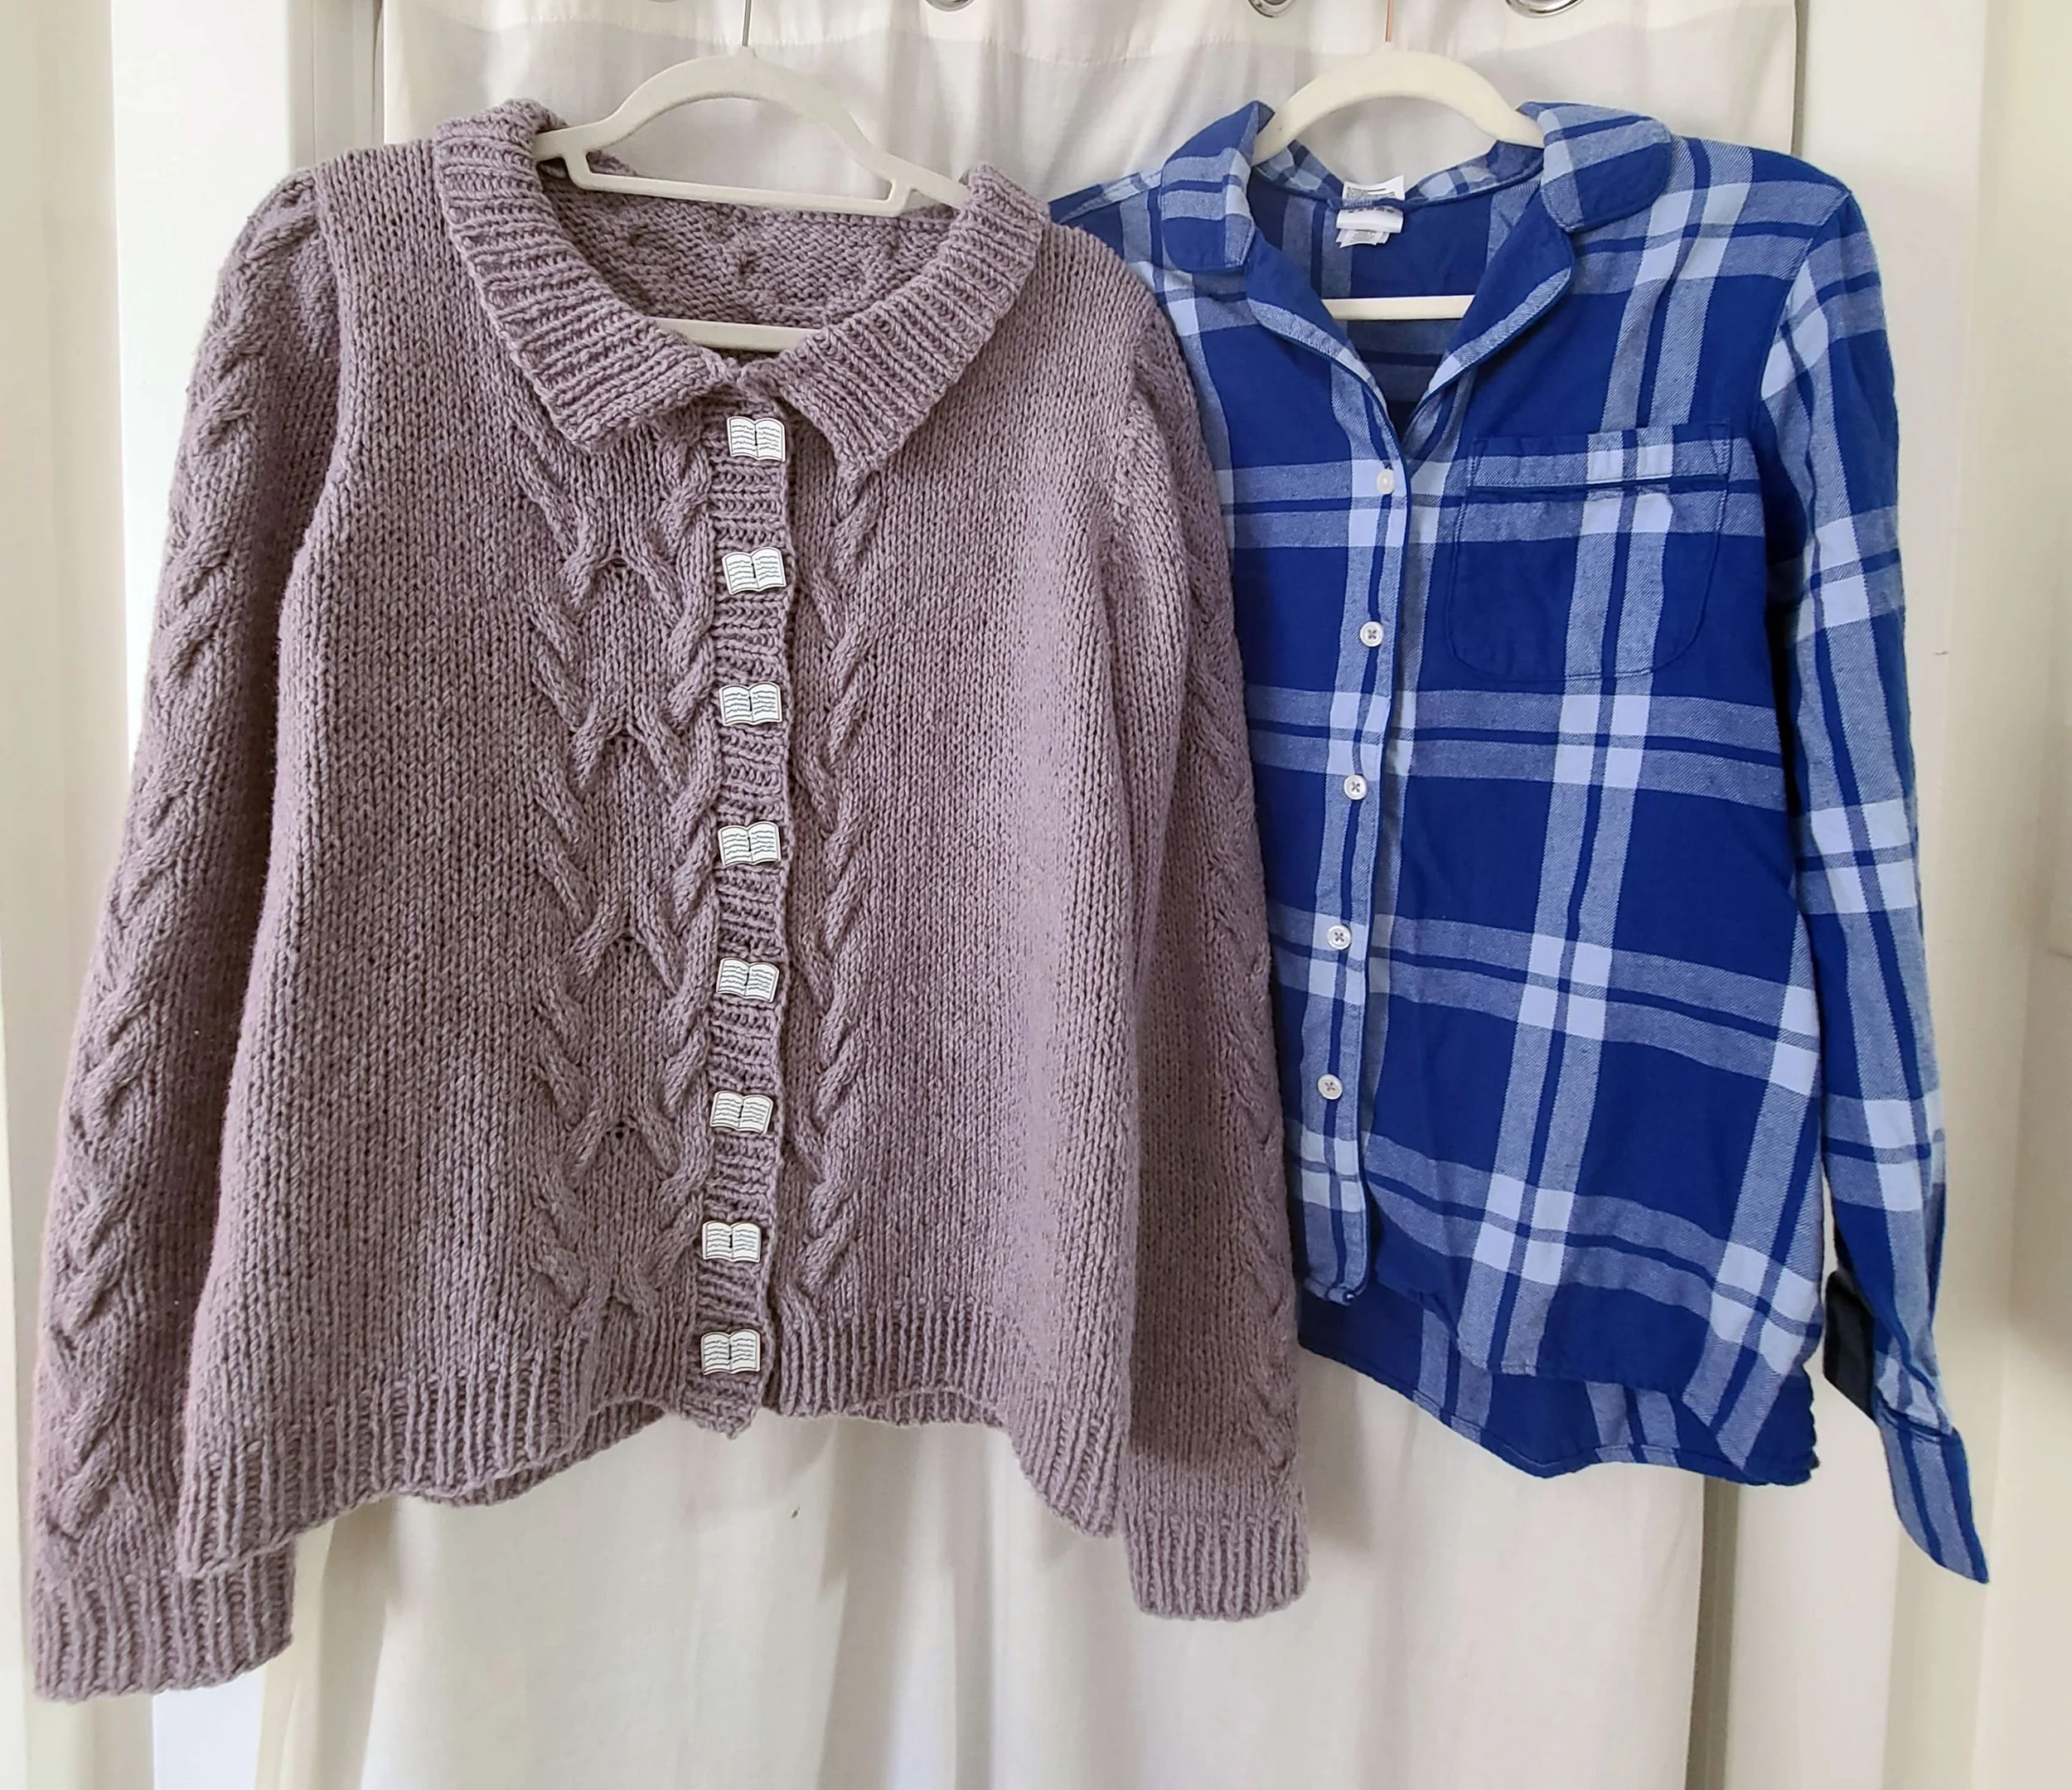
The photos here will primarily show buttons I recently attached to a handknit cardigan, but I will throw in a couple of the pajama top here and there.
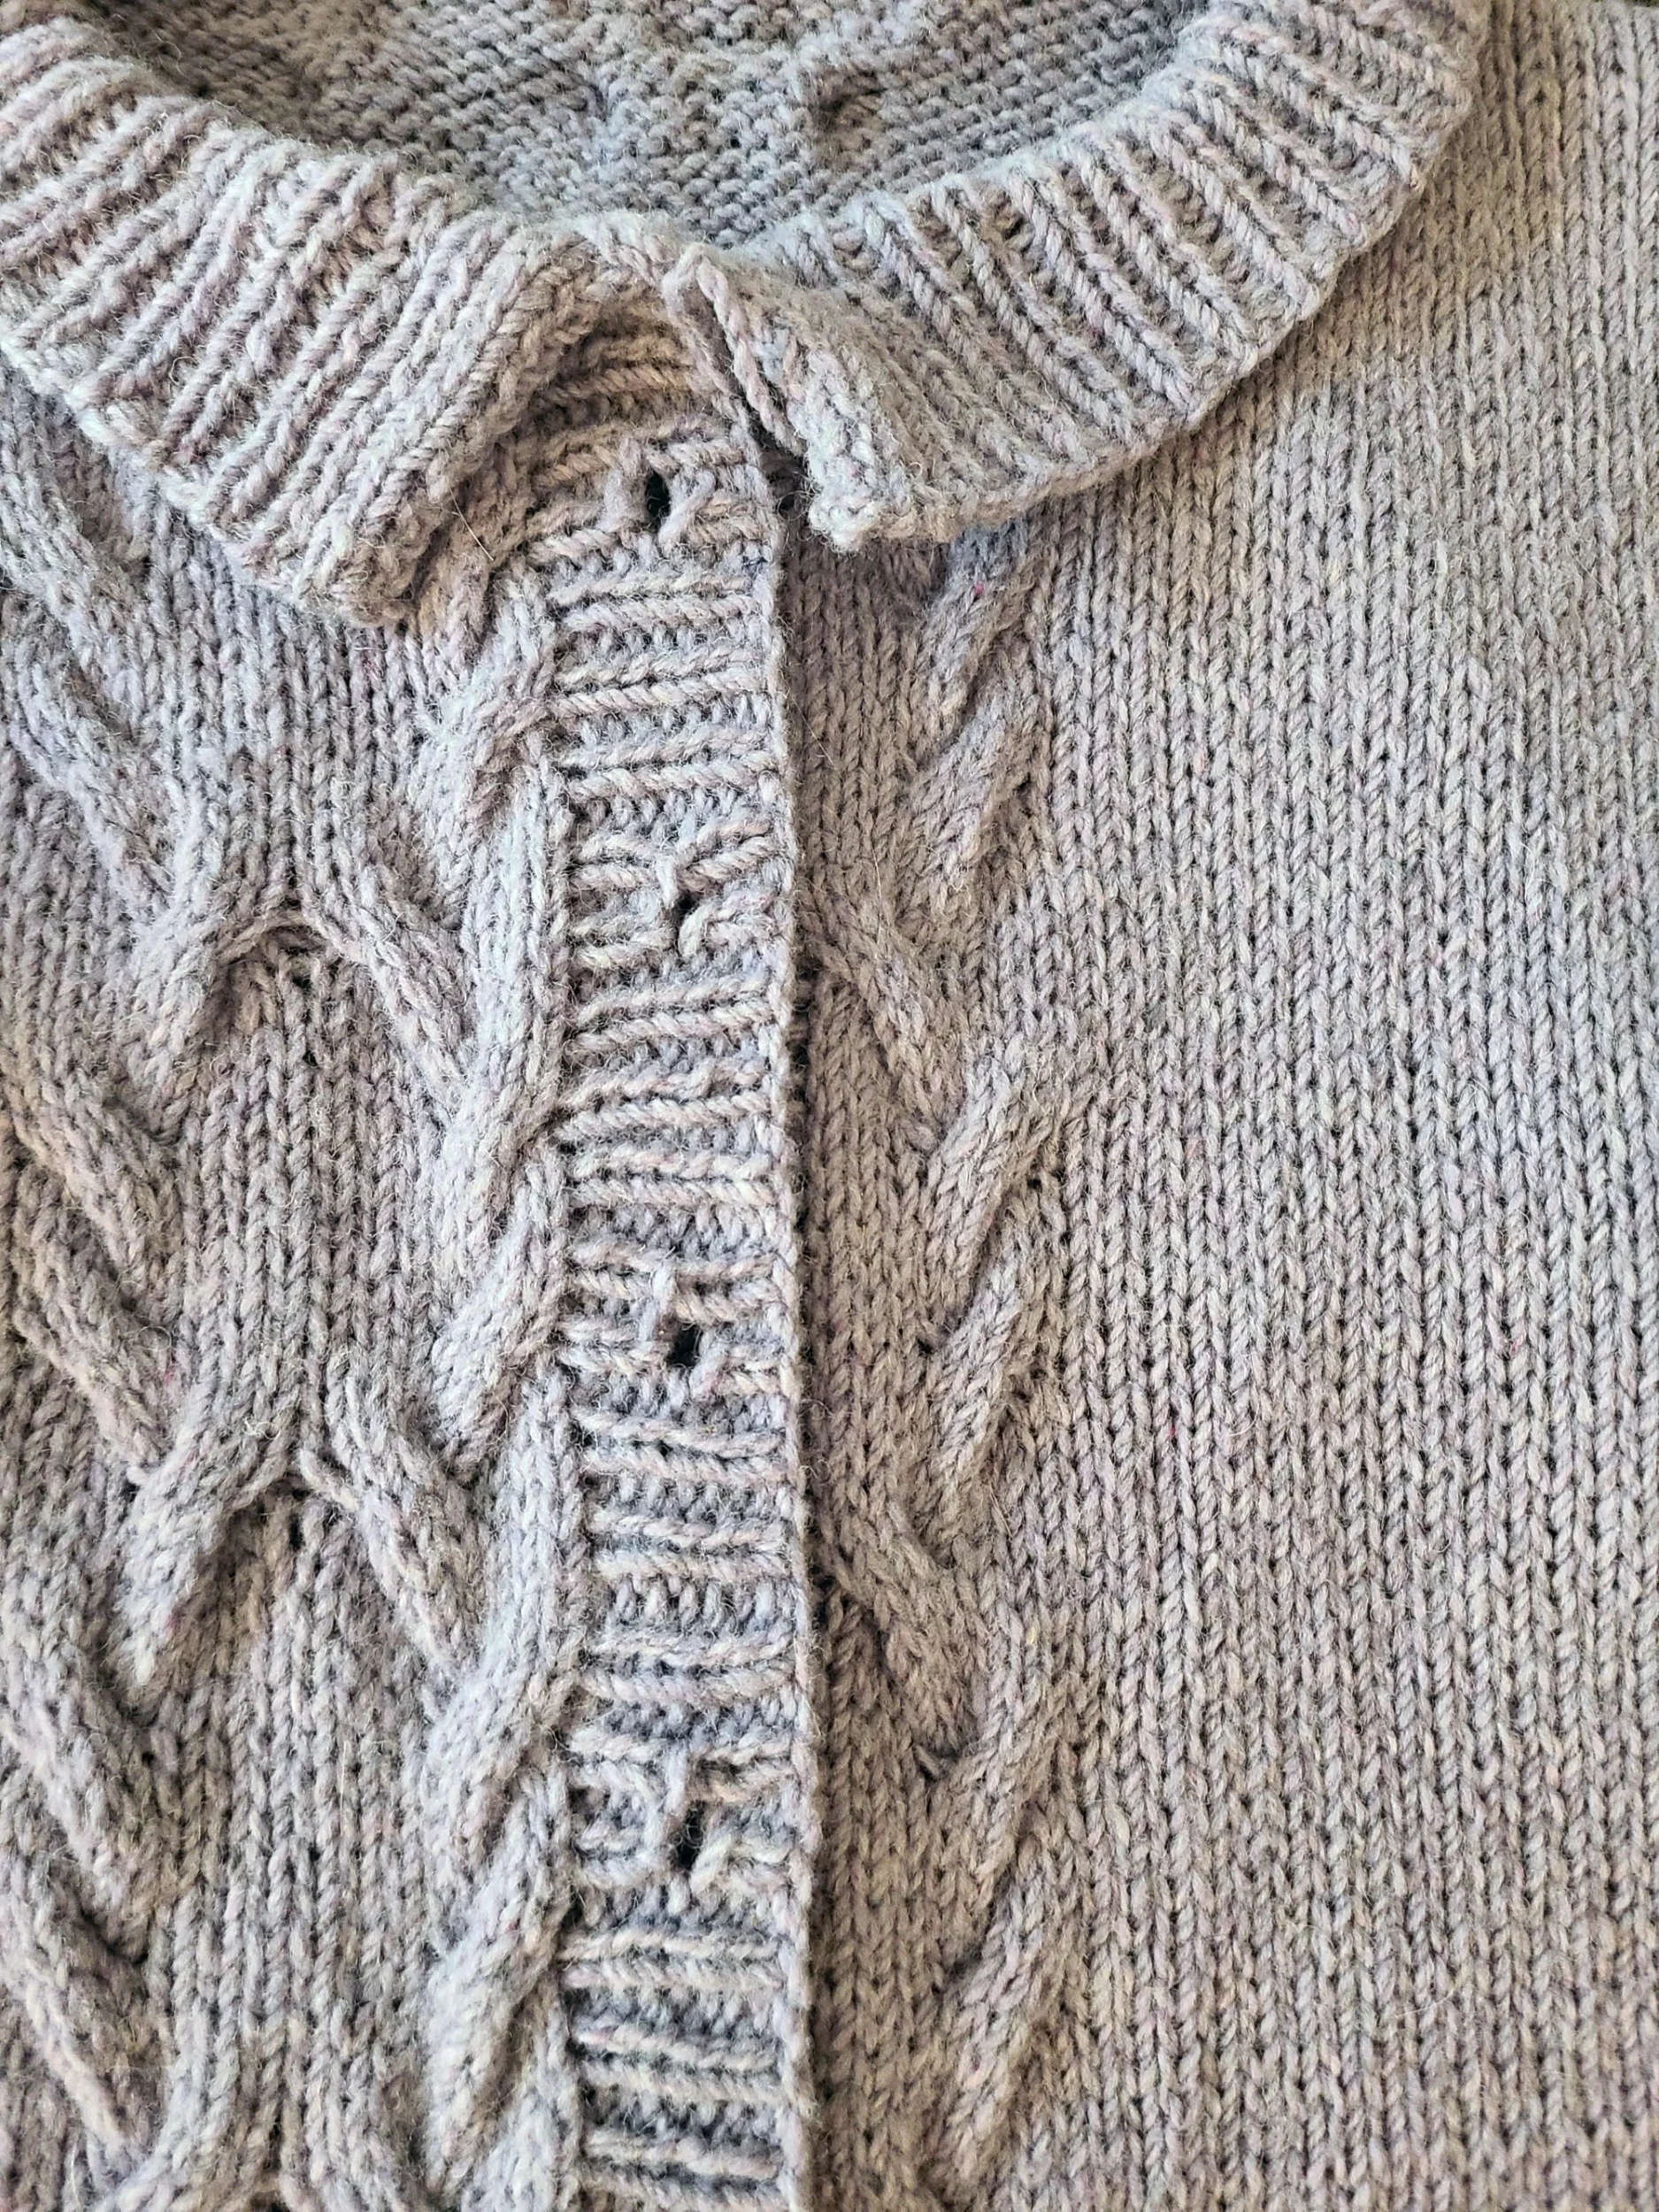
1. Lay your garment on a flat surface, with the fronts closed. The buttonholes should be lined up over the button band of the other side exactly how you want it once the buttons are attached. Make sure the top and bottom edges of the fronts are also lined up the way you want them.
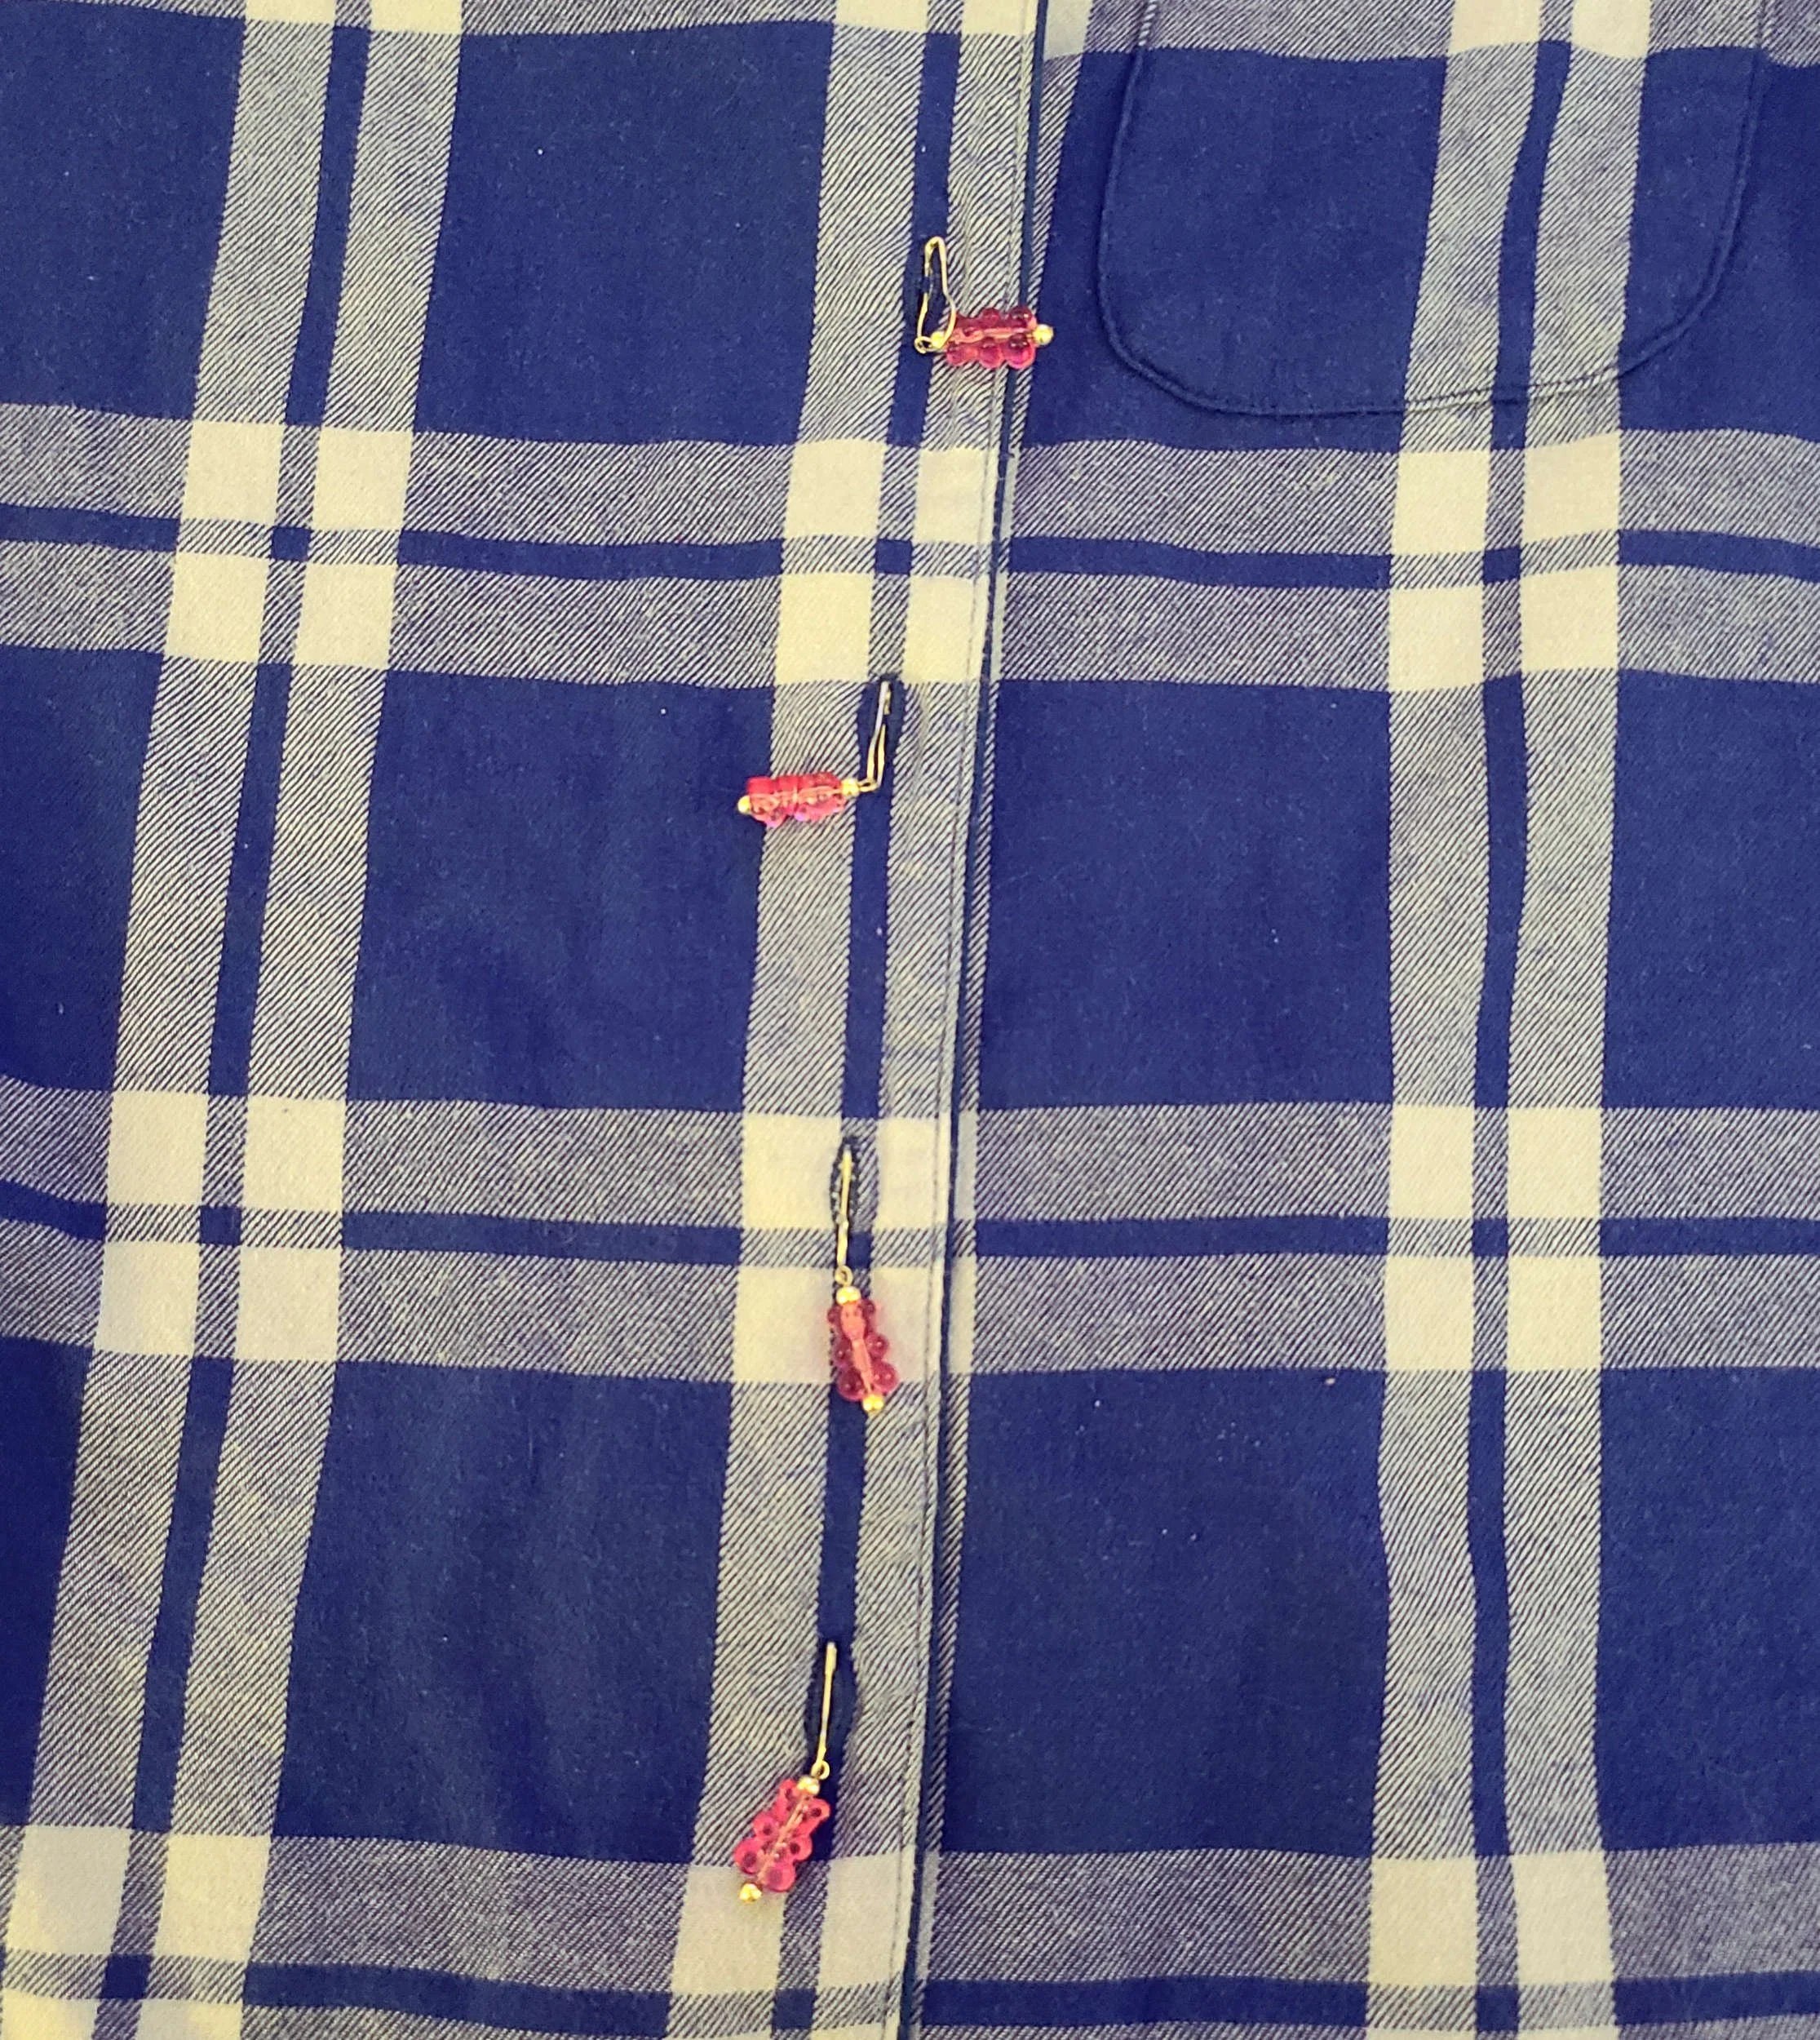
2. Open a stitch marker and carefully put it through the buttonhole opening (NOT catching any fabric/yarn on this layer) and through either one stitch (if knitted), or a small amount of fabric (if woven) on the layer beneath. If you’re using the safety pin kind be particularly careful to only grab this middle layer of fabric and not pin it to the back of the garment. Leave the end of the marker sticking out of the buttonhole (almost as if it’s a button itself).
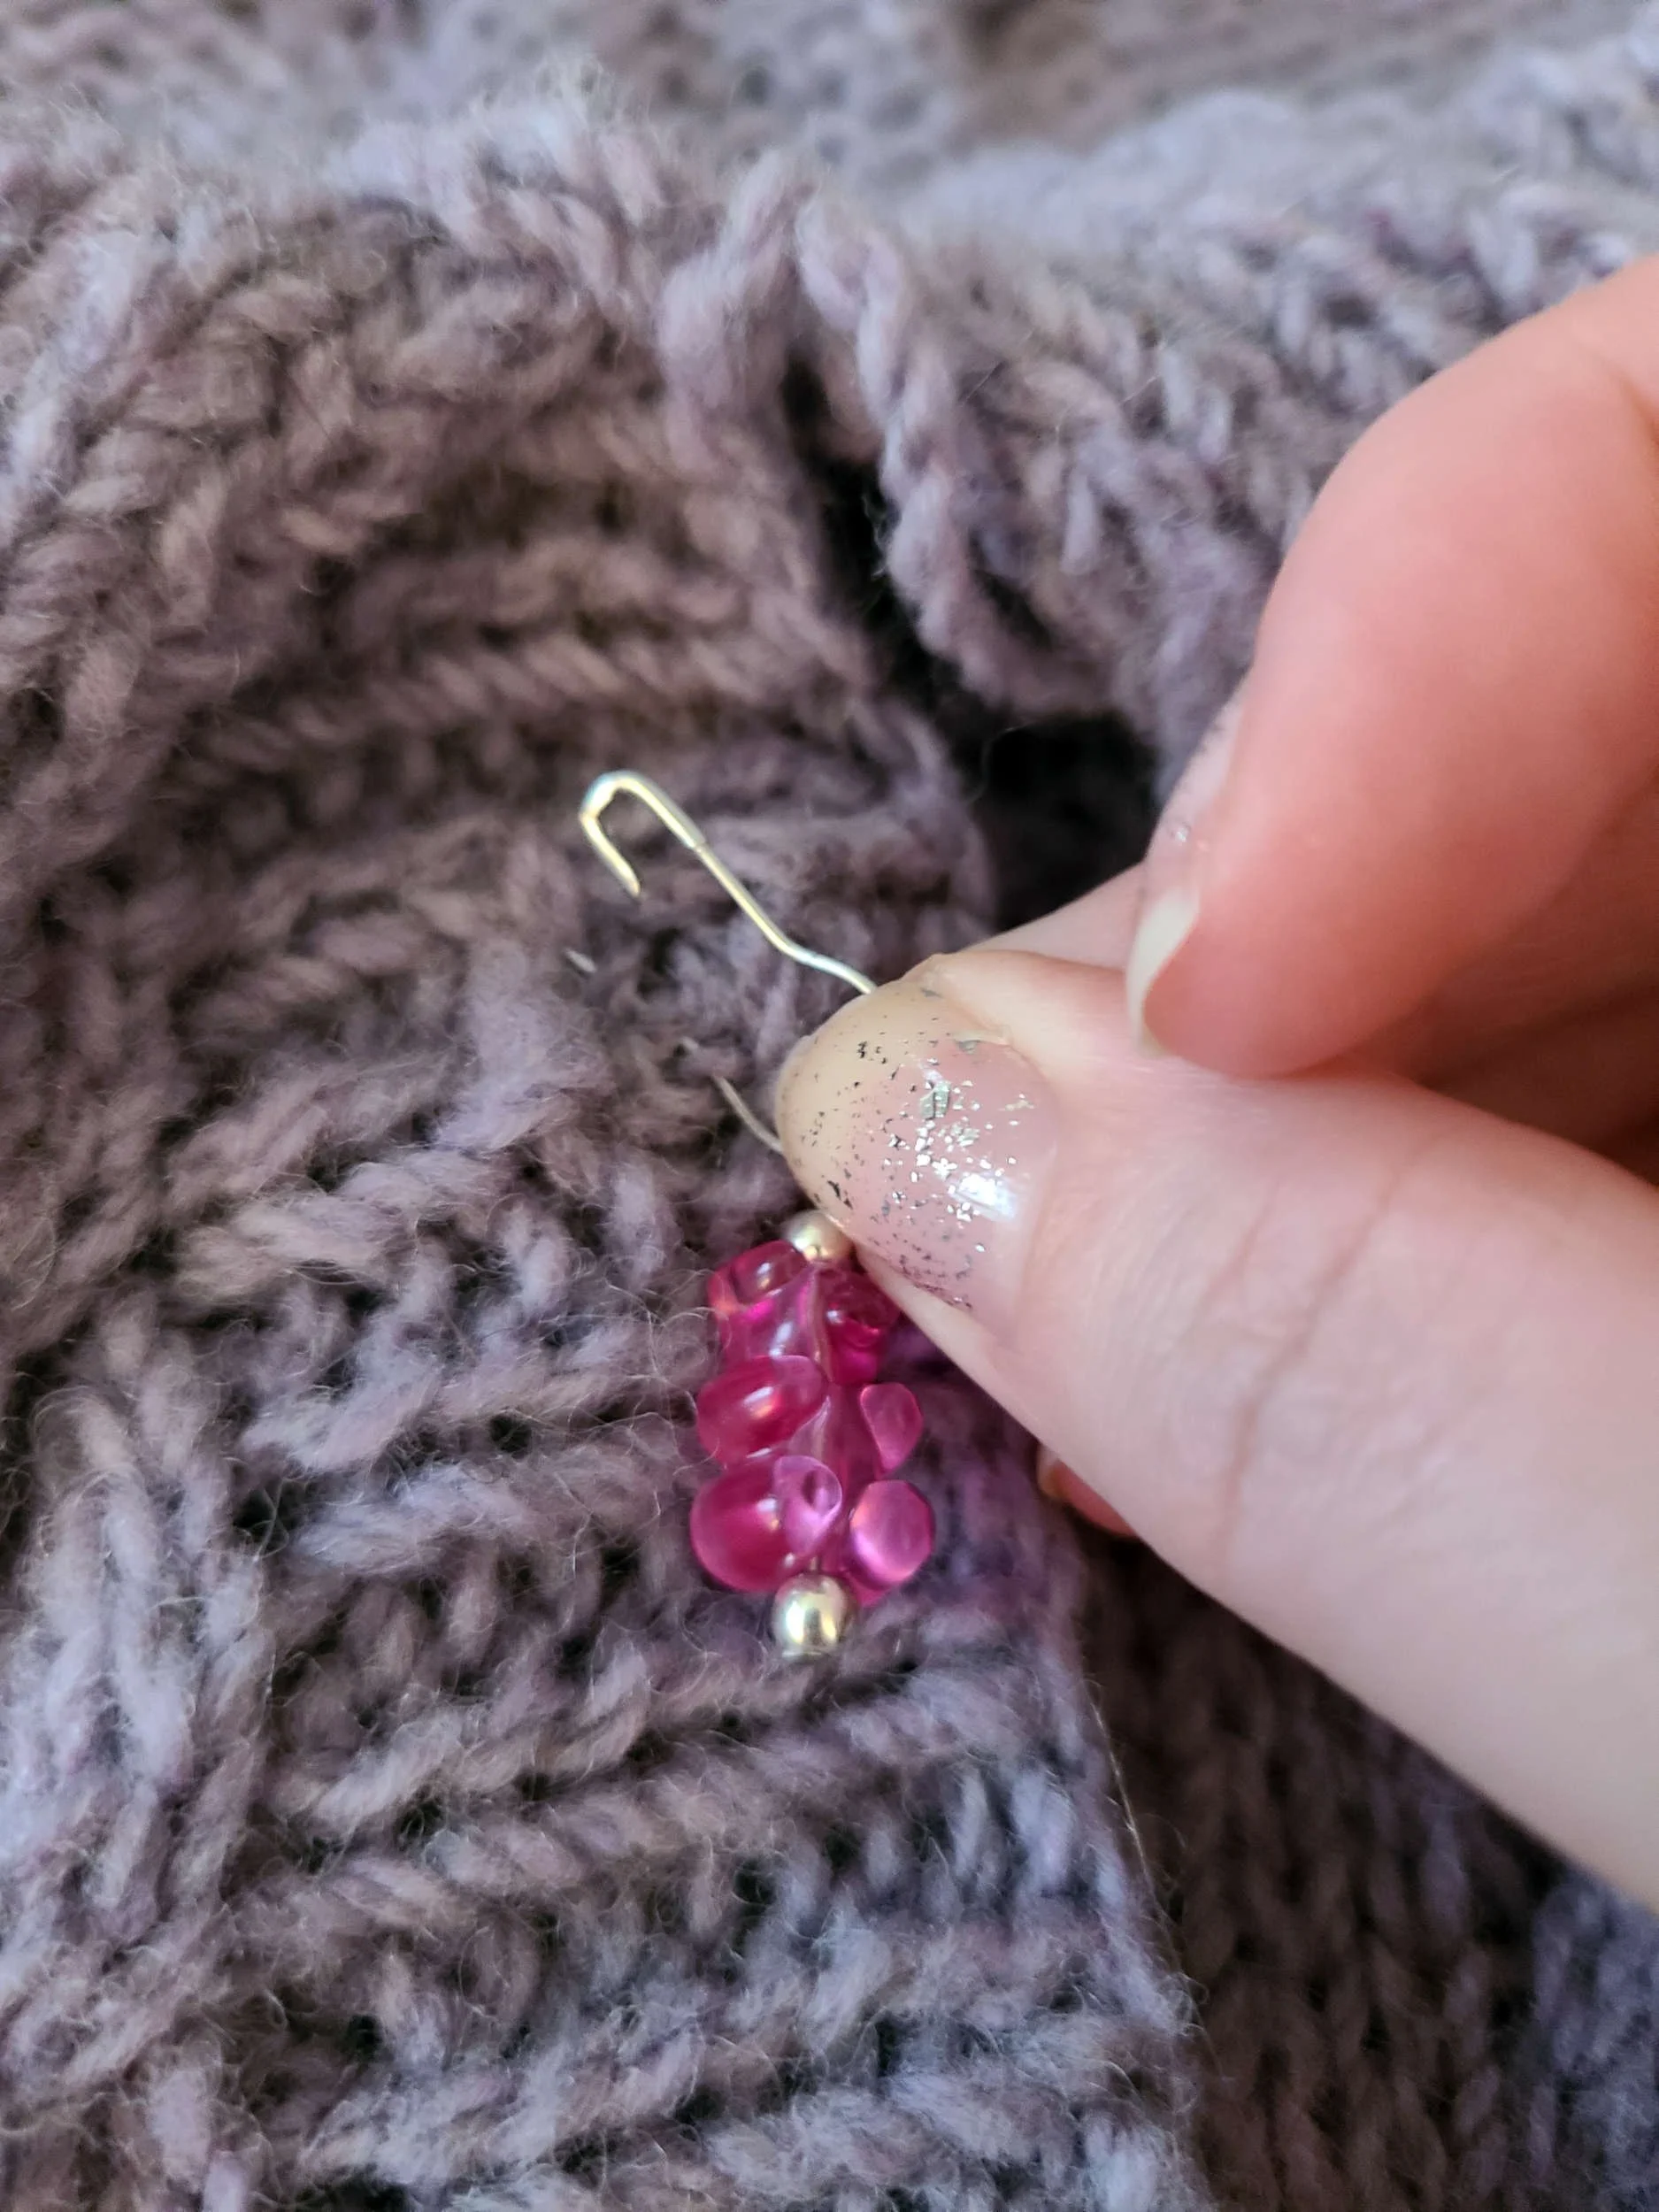
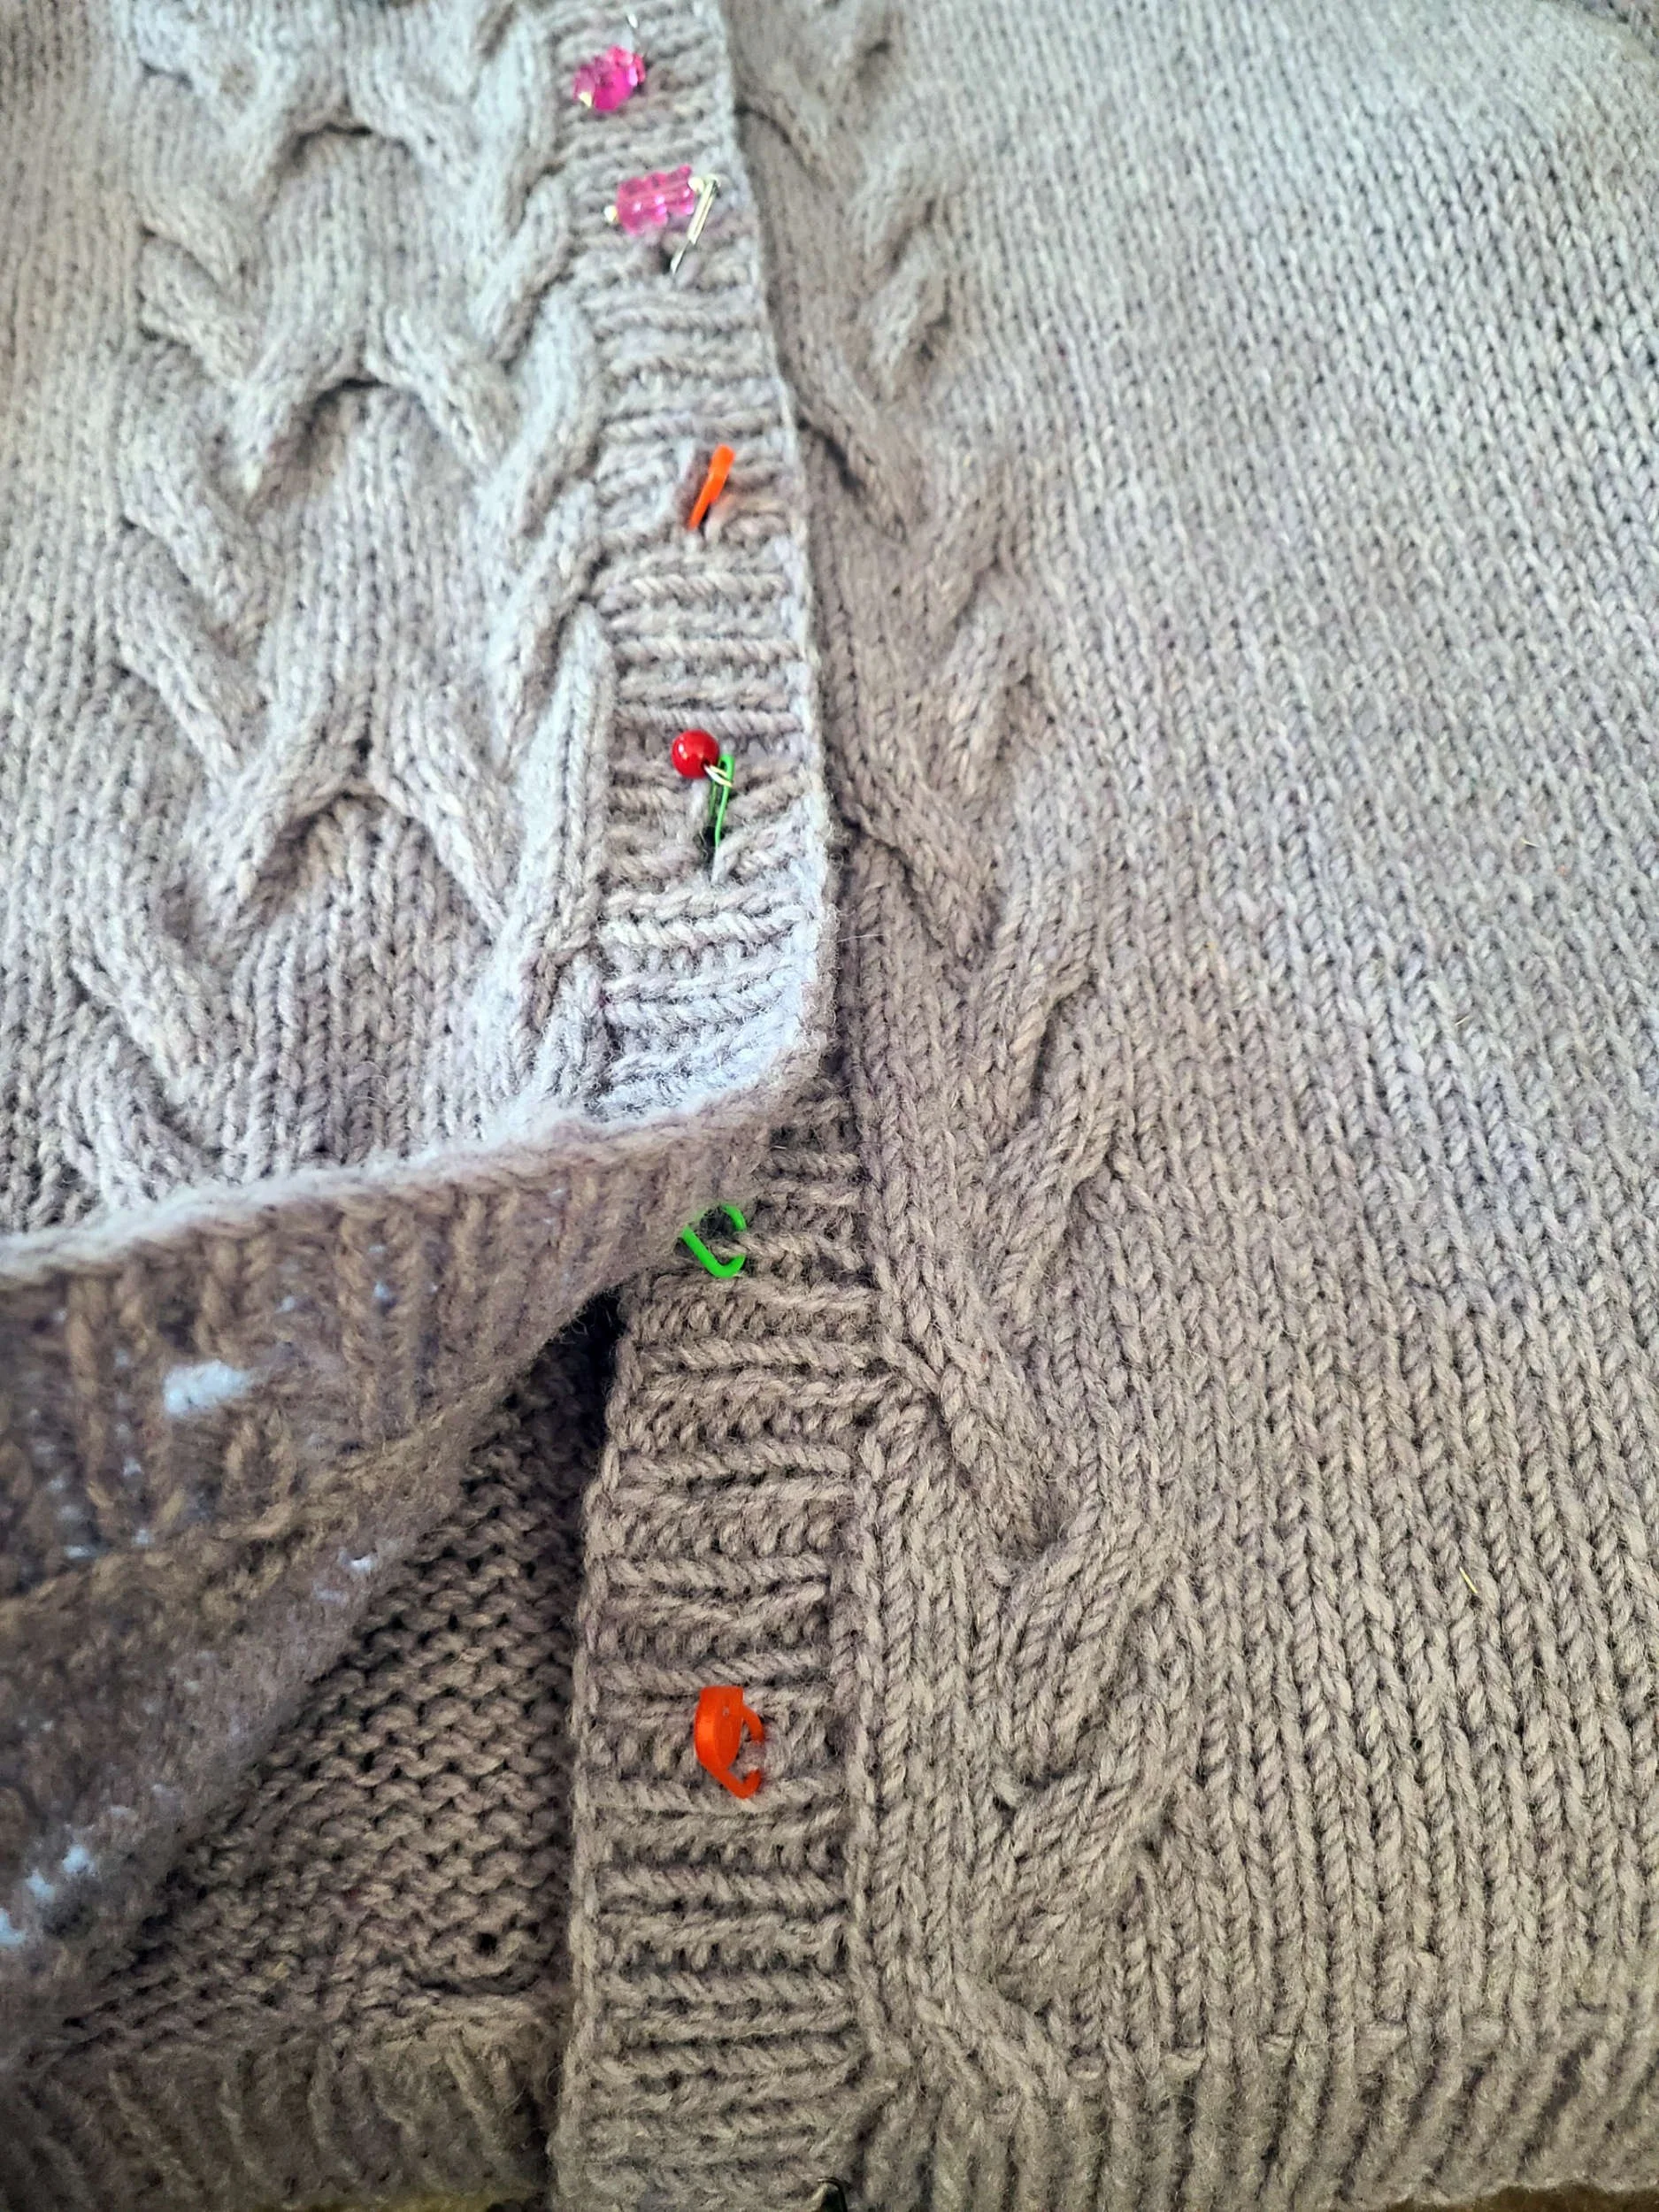
Handknit pinning.
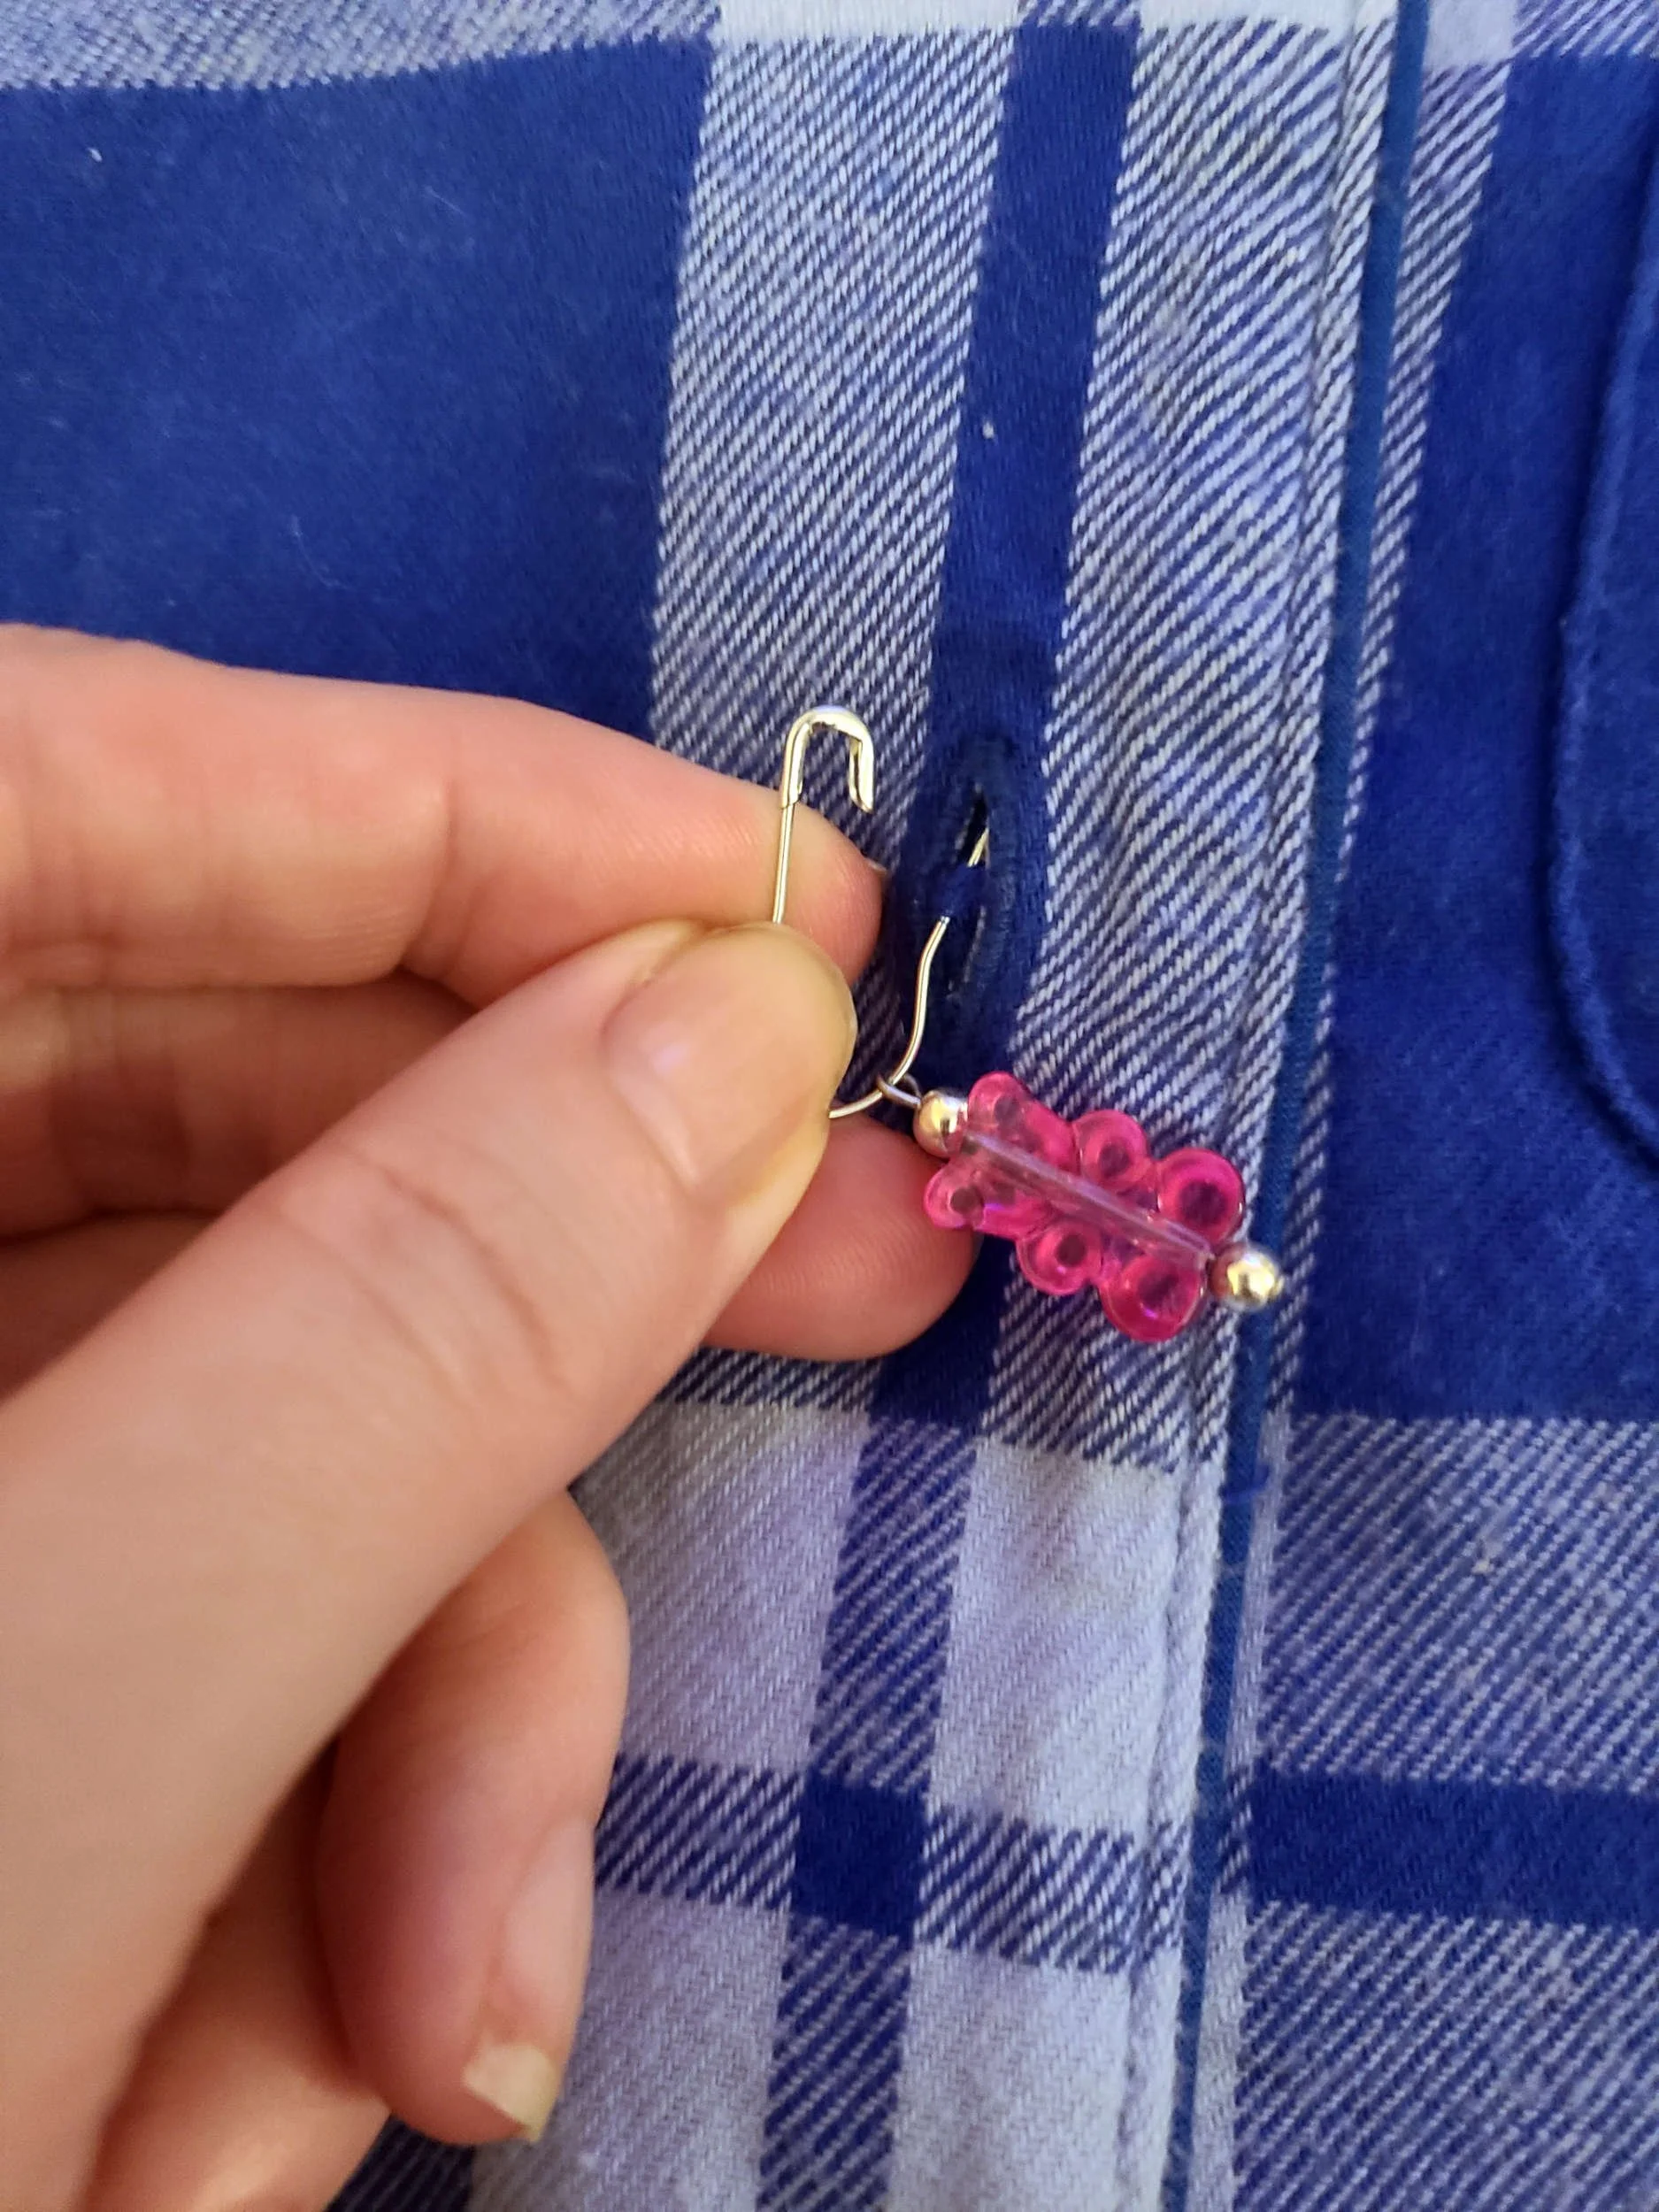
Fabric pinning.
I always start with either the top most or bottom most buttonhole because it’s easiest to pin without shifting the fabric. Once that first marker is pinned you can slide your hand into the garment to hold the fabric in place if necessary.
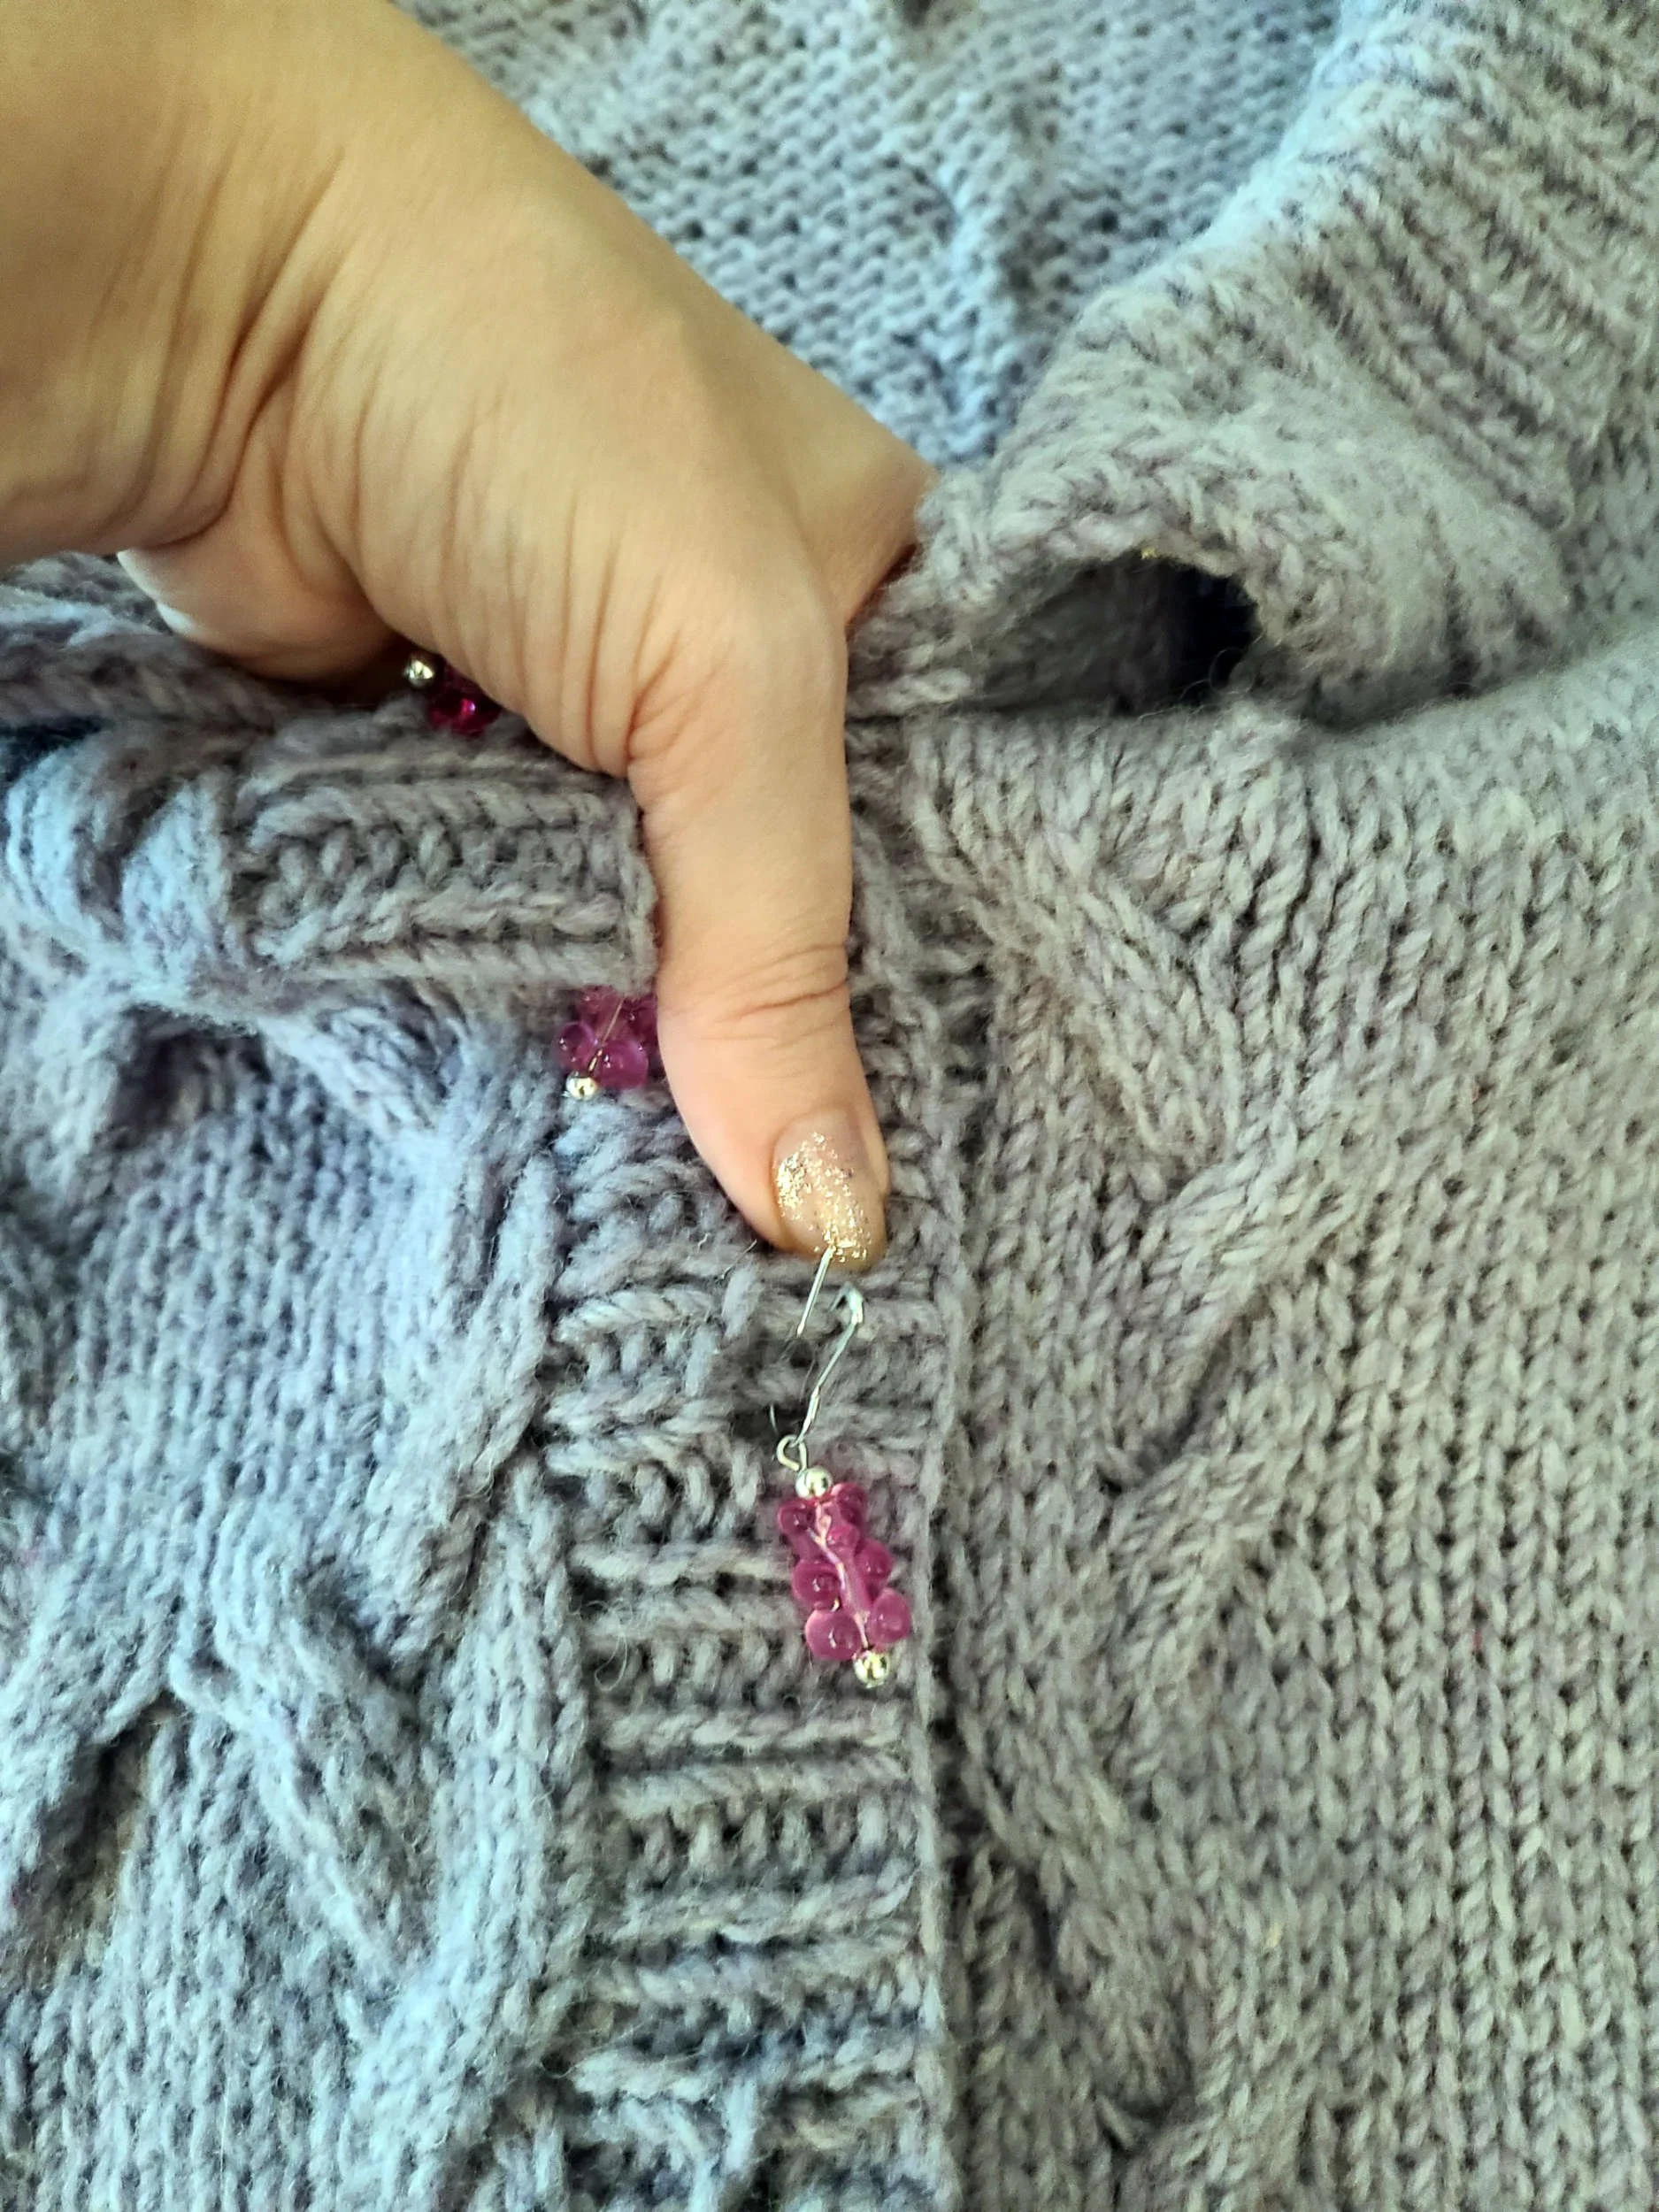
This is how I positioned my non-pinning hand to get to the second buttonhole from the top.
3. Keep pinning until all the buttonholes are “buttoned” with stitch markers. If you’ve pinned a stitch marker out of position, you’ll see a crease or bump in the top layer of fabric, so adjust any of your pinning at this point if needed. Then gently lift and open the buttonhole side, letting the stich markers slip through. I say gently because if you’ve accidentally pinned parts of the garment together, you want to be able to stop and adjust at this point before everything gets out of alignment.
4. Thread your needle and grab your buttons. I like to use a double length of thread with a knot at the end so I can secure it by pulling the needle through the loop on the first stitch, but use whatever method you prefer to secure the ends of your thread.
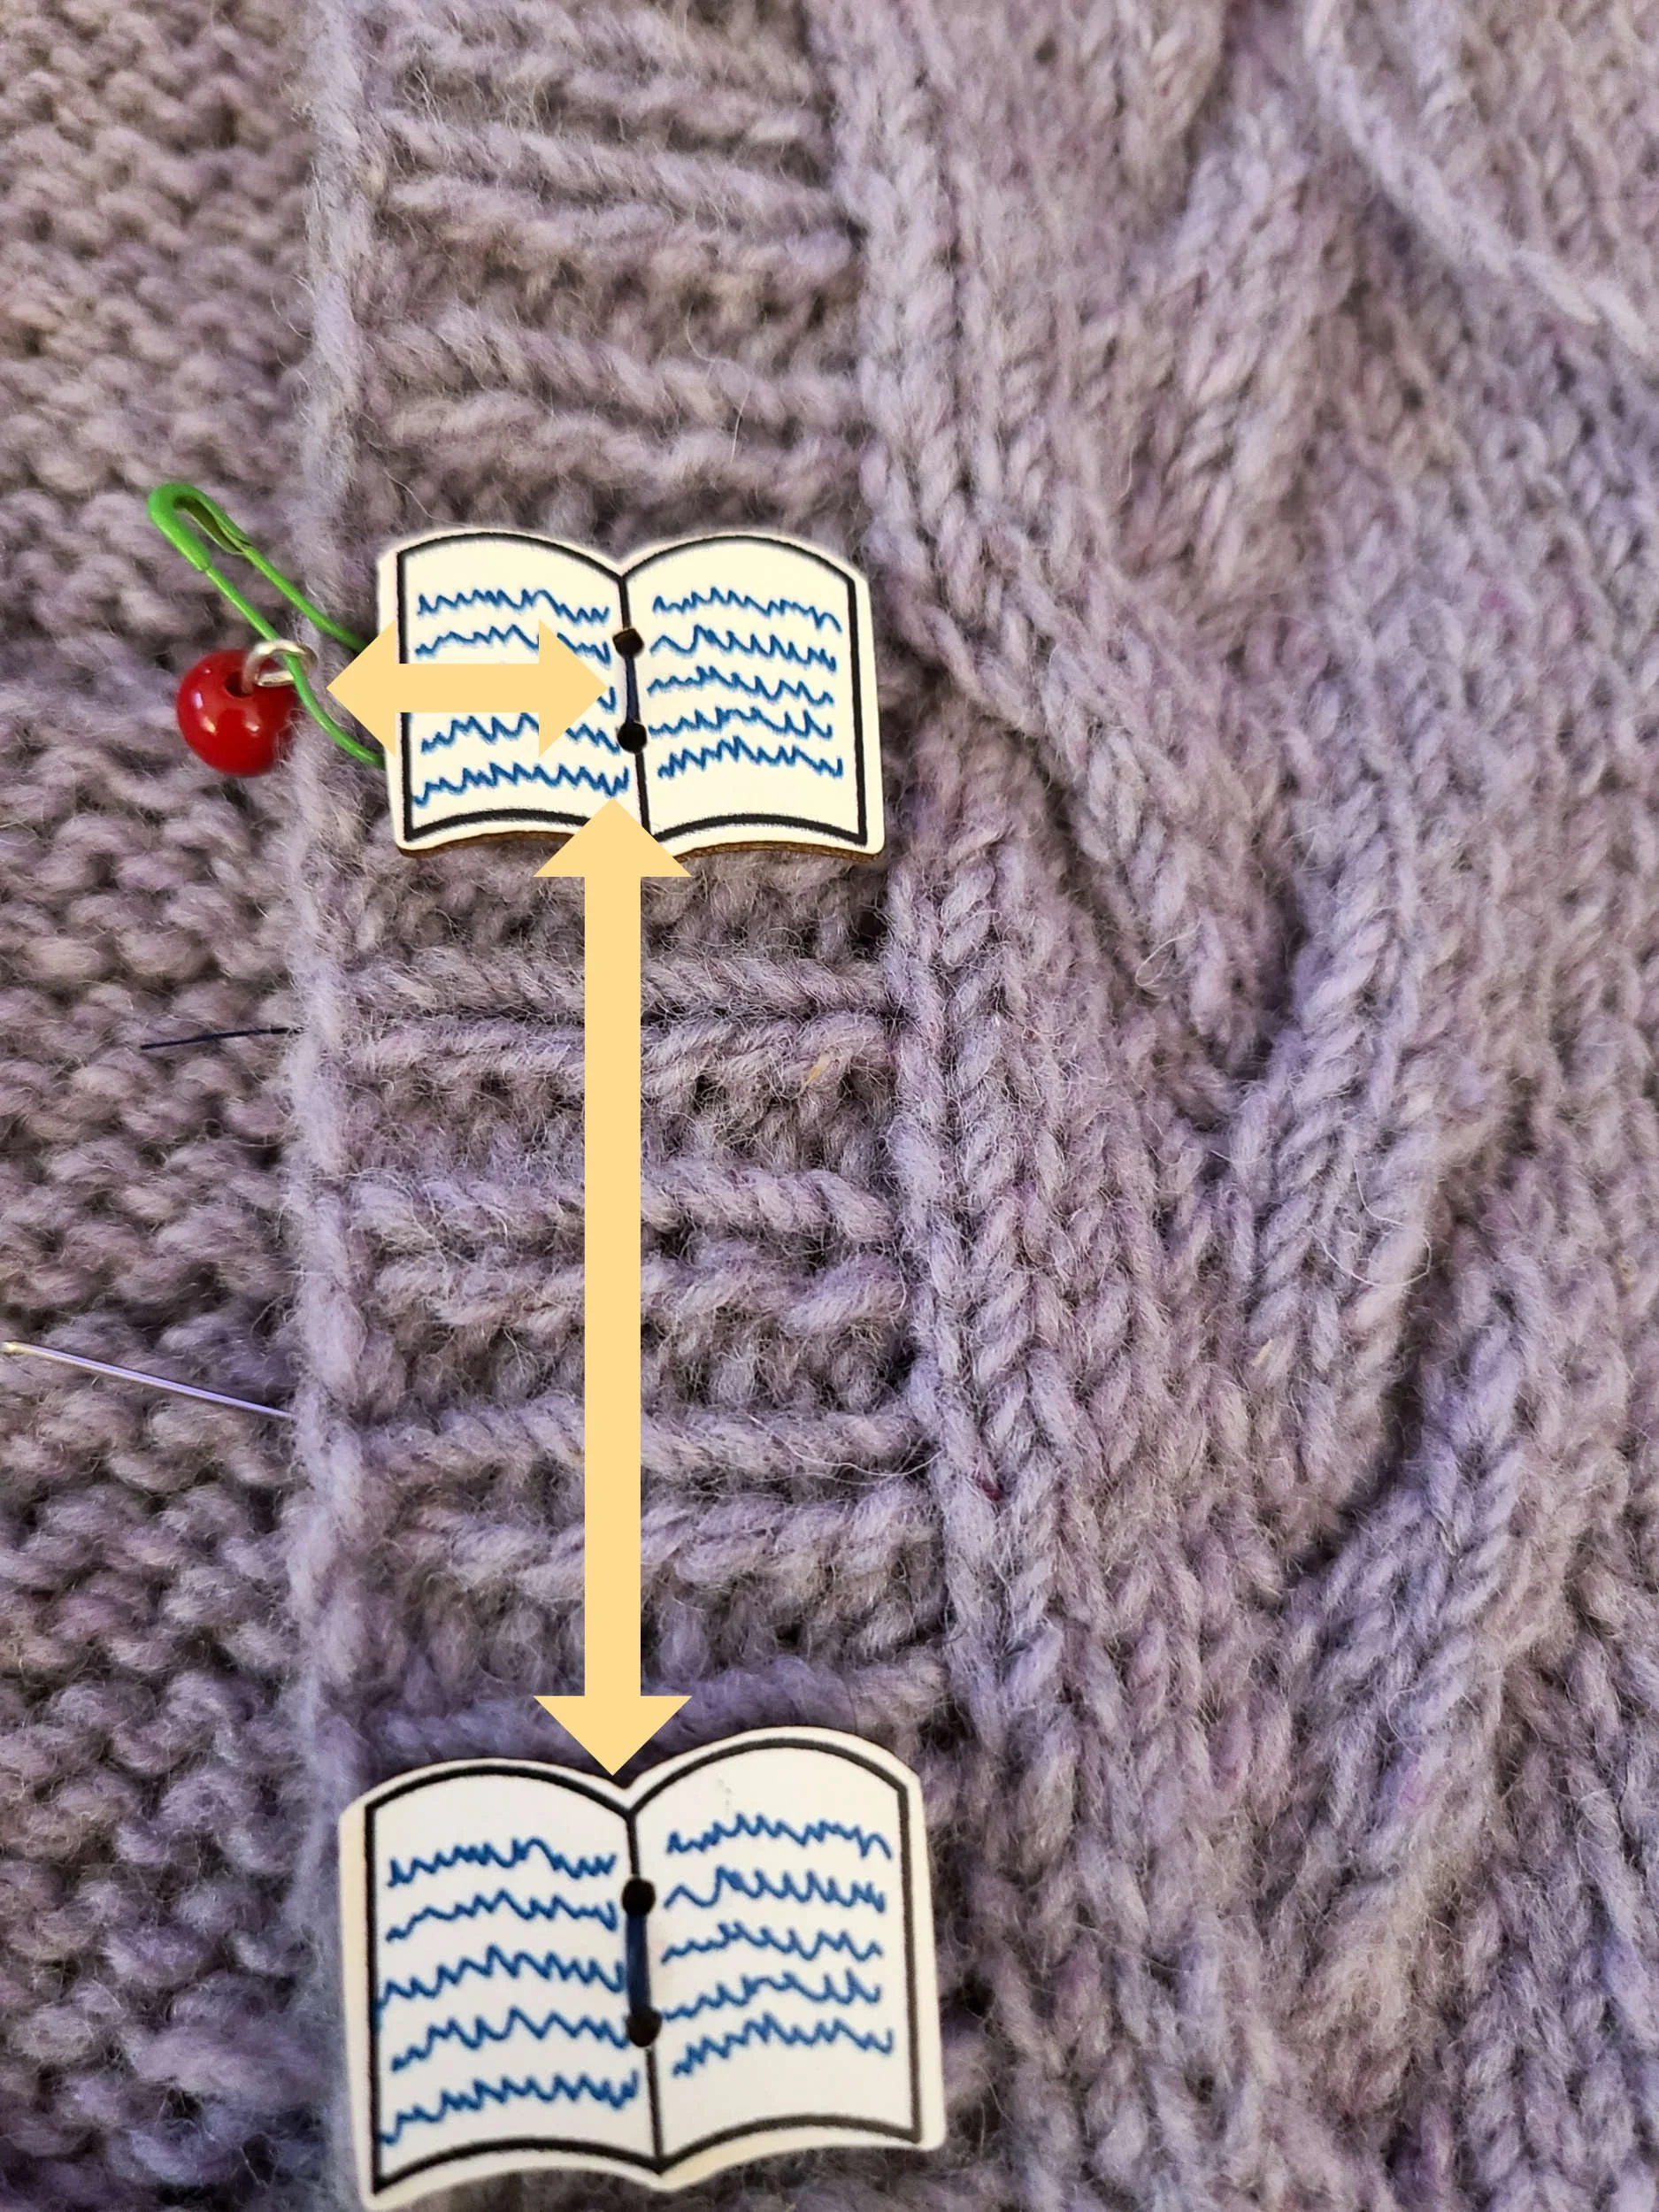
5. Hold the button over the stitch marker with your hand and make the first stitch through the button loosely, while the stitch marker is still attached – this helps get your placement exactly where you want it.
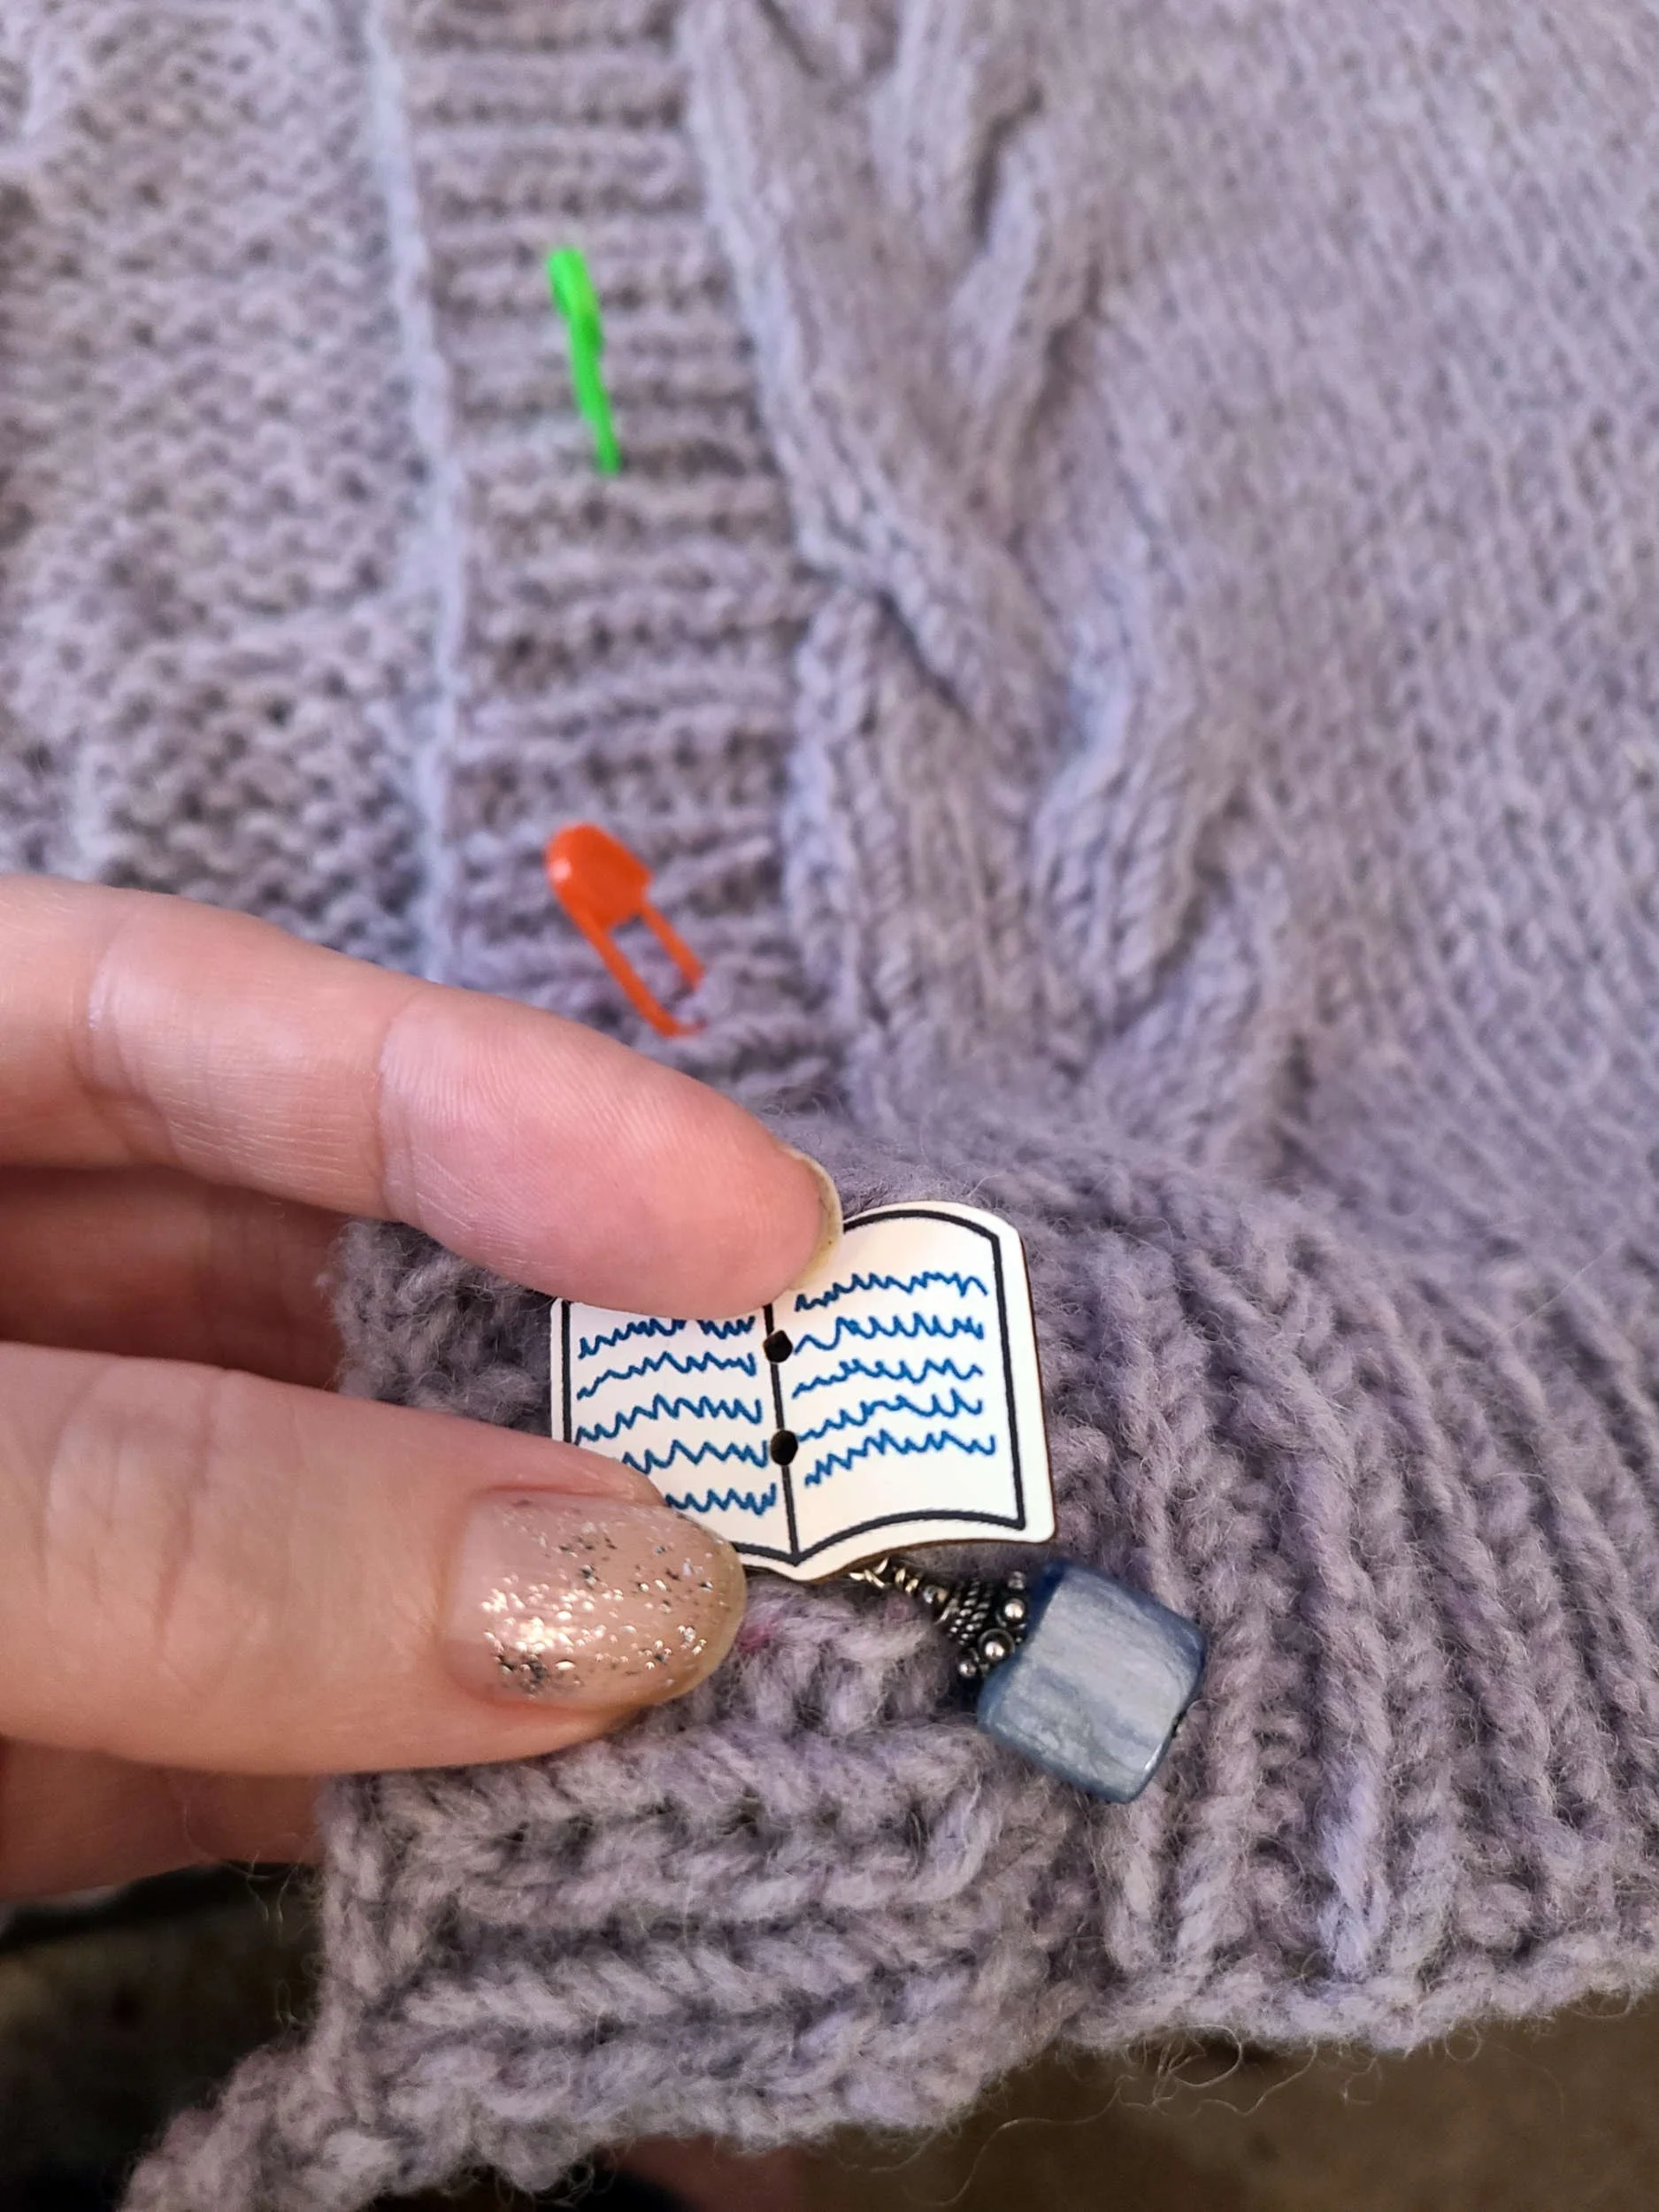
Note: If you find that the stitch is a little off center from where you want the button (as I found on one of my sweater buttons), you probably came through the buttonhole at a bit of an angle when you pinned. This is an easy fix – just align the button horizontally with where the stitch marker is pinned and vertically with the buttons you’ve already attached.
6. Once the first stitch is made, remove the stitch marker and finish sewing your button more securely to the fabric. I like to test each button by slipping it through the buttonhole as I finish sewing it but before I knot off the thread, just in case it slipped at some point and is no longer aligned. But I find with this method that doesn’t happen as often as it did when I was trying to mark the buttons with straight pins.
7. OPTIONAL BONUS STEP: If you are sewing onto a handknit sweater made with thick yarn, you may want to raise your button up a bit with a shank – this allows the button to sit on top of the extra layer of fabric created by the buttonhole band without pulling too tightly and warping the fabric. (I can’t remember which knitting YouTuber I learned this trick from but it’s really improved the look of any buttons I attach to worsted weight or higher sweaters.)
Take a small length of yarn leftover from your sweater and wrap it around that first button stitch between the back of the button and the buttonband itself, creating a little cushion that pushes it up off the buttonband layer. If you have a larger button, like I did, you might want to wrap it around a couple times.
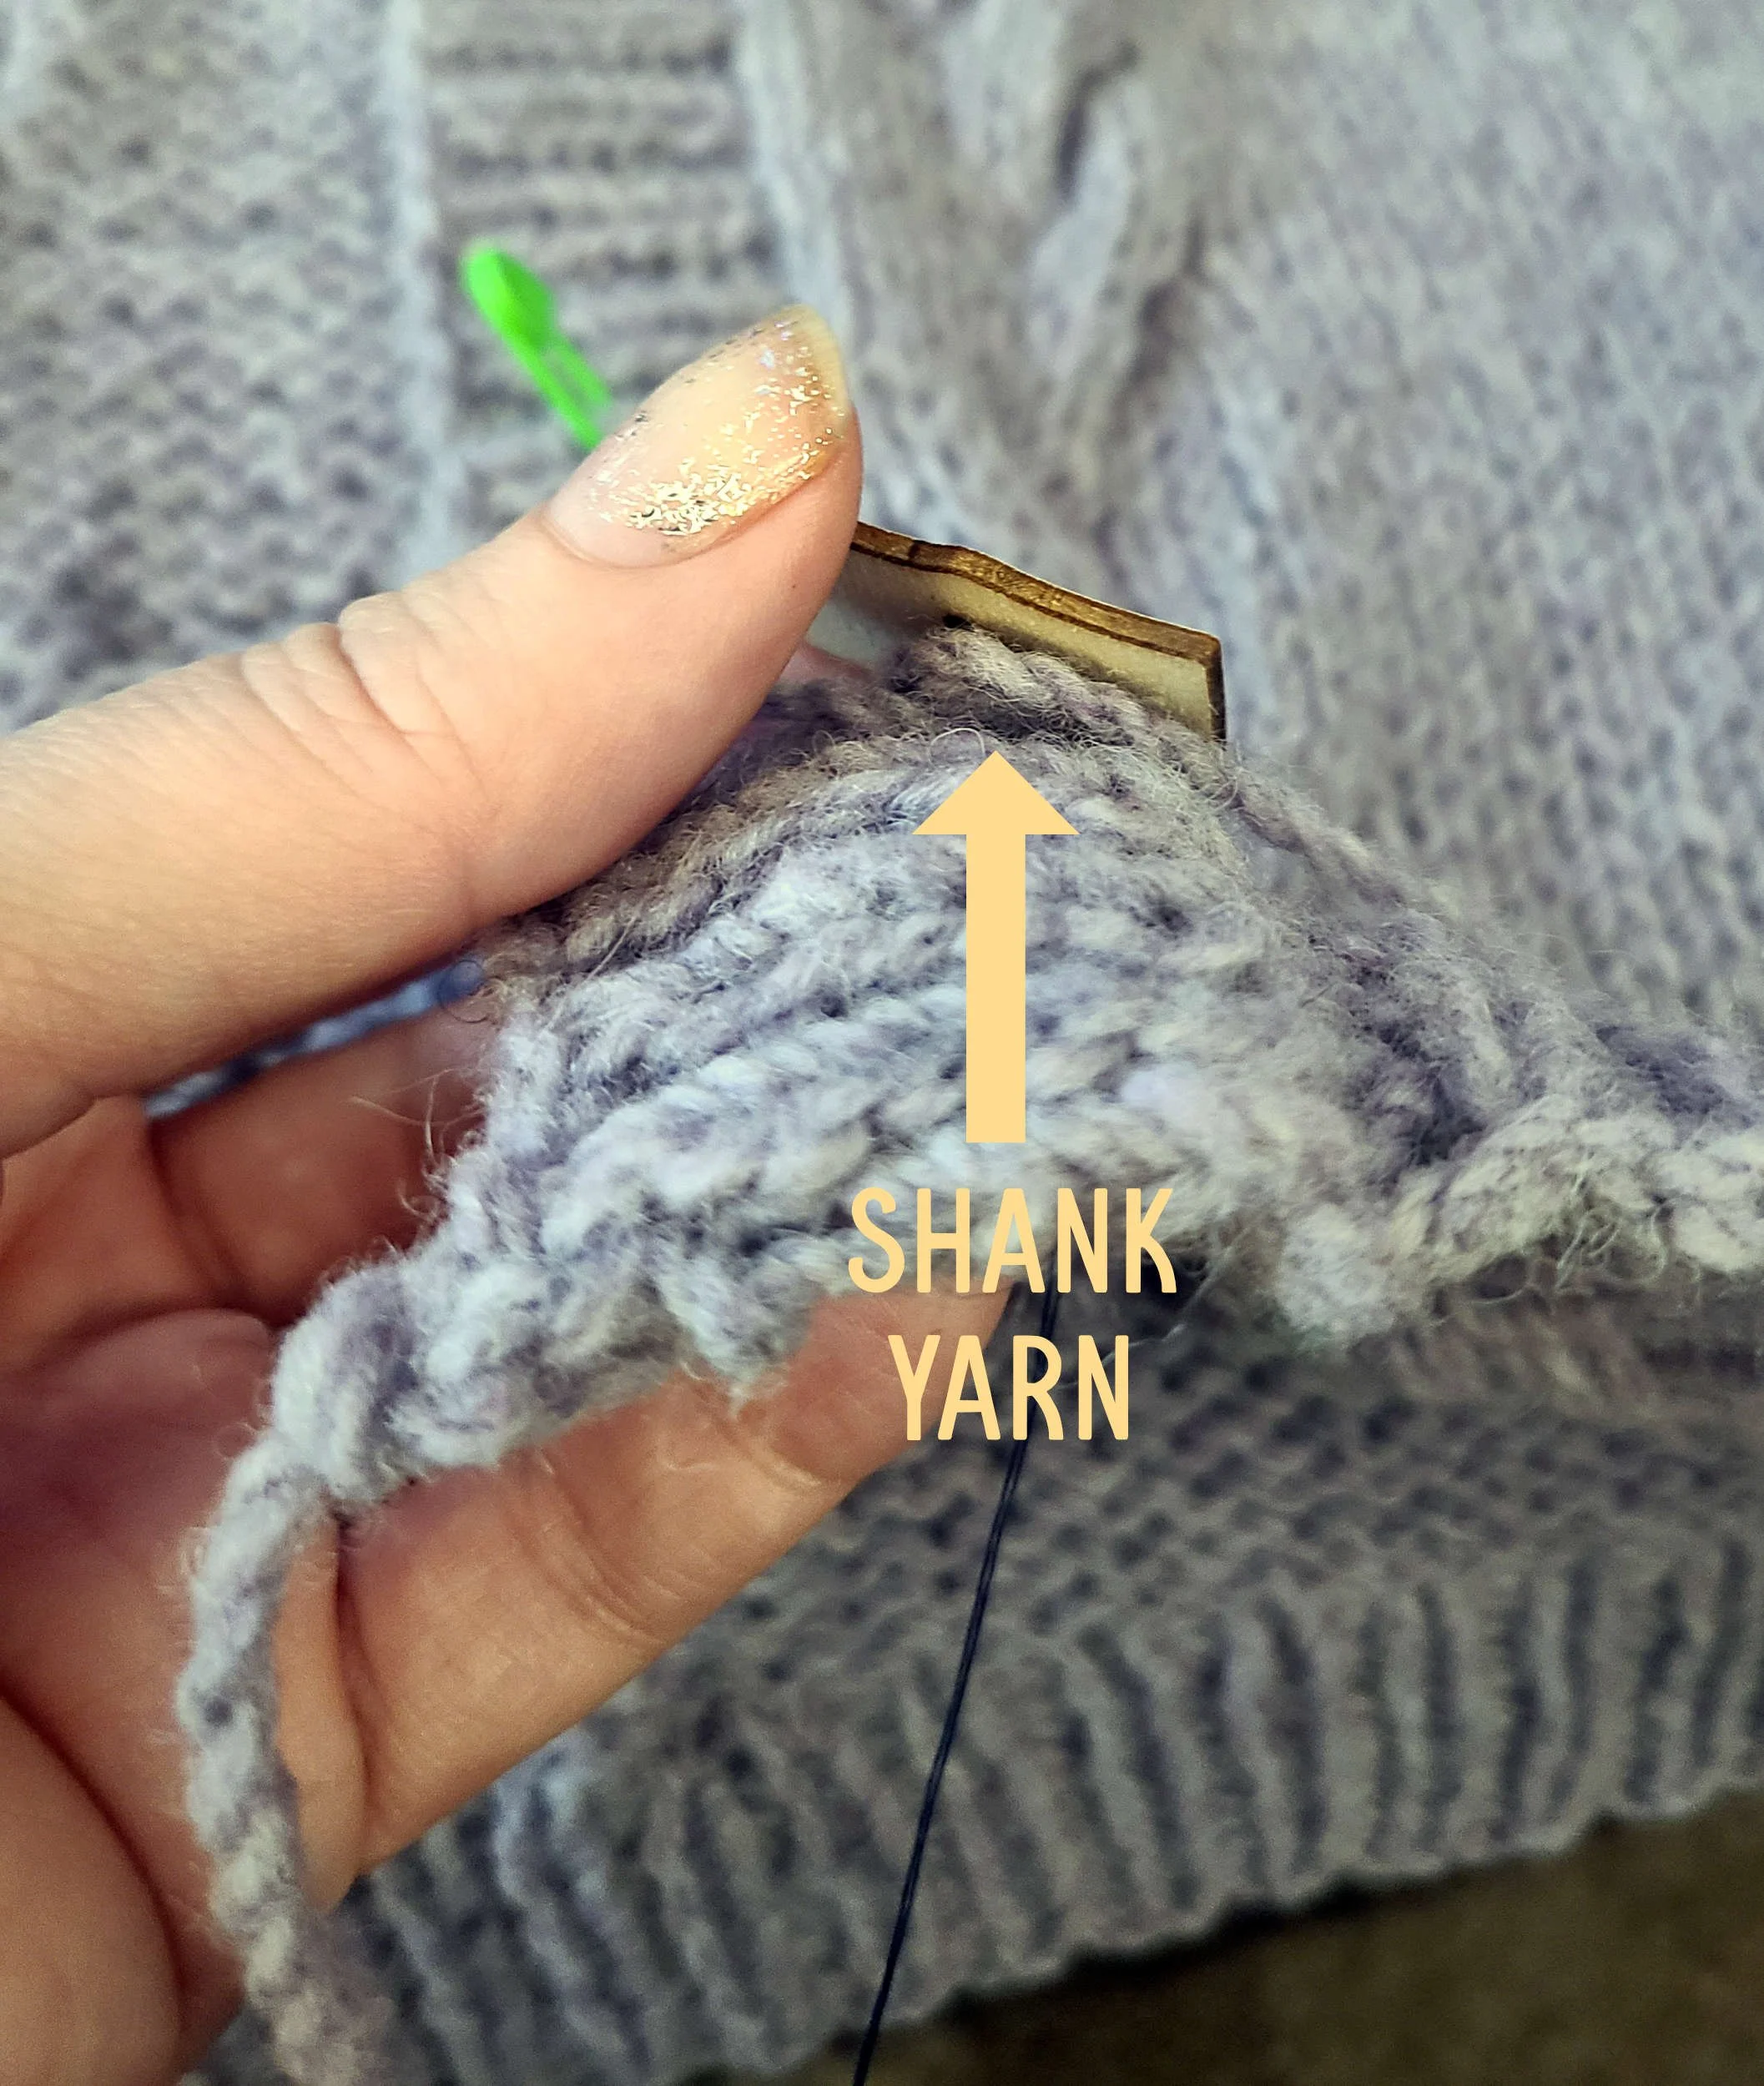
Sew through the button a few more times, trying to catch the wrapped yarn in your stitches so it’s more secure. When you’ve finished sewing your button and tied off your thread, use a yarn needle to pull the ends of the wrapped yarn to the back. I like to weave them in over where I sewed the button, so the thread knot doesn’t show. You can also make shanks for buttons on thick fabric (one recommendation is to use felt behind the button) but that wasn’t necessary on the pajama top.
Try on your garment and enjoy!
Have you used stitch markers to help sew on buttons? If you’d like to see more ways stitch markers can be used, see my posts on six uses for stitch markers, and how to make emergency stitch markers from household items.
I’m Whitney, a tech editor, graphic designer, and lifelong crafter. Join me for an exploration of my latest knitting, crochet, sewing, and upcycling projects, tips on knitting technique, editing tips for knitting designers, and more!