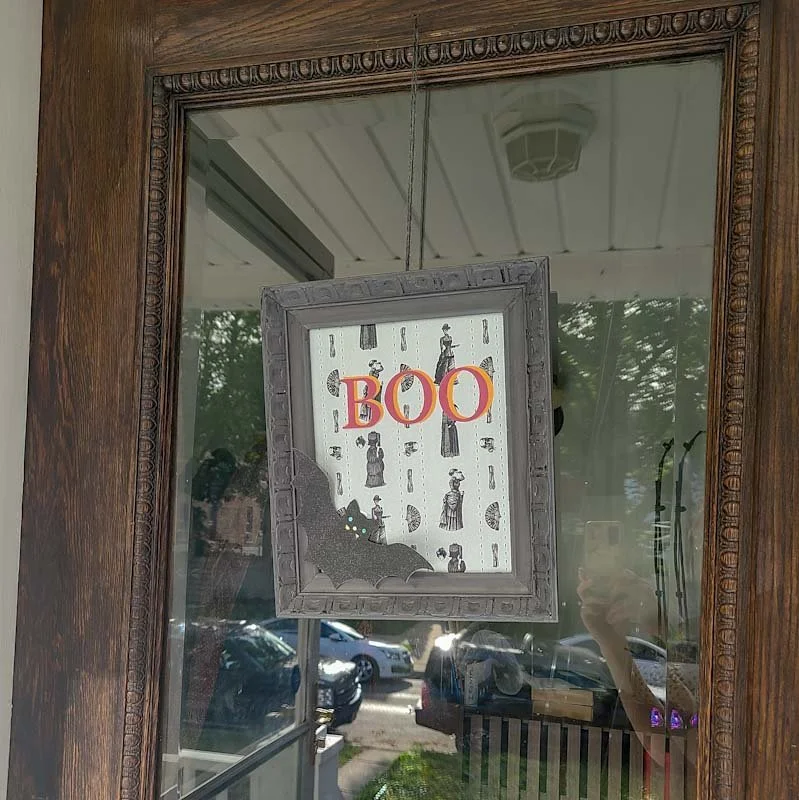
Procrastination Proof Crafts: The Two Day Halloween Door Decor
Procrastination Proof Crafts is a series focusing on simple seasonal crafts that can be done in one or two days, for all of us who save a ton of holiday craft ideas … and then wait too long to start them.
We did our serious house hunt for our move to Chicago in early November, which is how we knew the neighborhood we moved into was VERY into Halloween decorations. We did a few easy things for our first Halloween last fall, but I’m definitely hoping to slowly add to our front porch display over time.
When I purchased the wallpaper samples for my Spoonflower Metallic Wallpaper test, I knew that I wanted to use the Victorian Ghosts wallpaper for something Halloween related. As it happens, I have a small collection of old frames that have a cool shape, but aren’t in good enough shape to use for nice photos: when I acquired them from my grandparents they had been used for years to display cheap cardboard prints of famous artworks and were missing both the glass and backing. I attempted to paint them and made things even worse by the ill advised choice to put clear varnish on top of white paint, which very quickly yellowed.
(Just as an FYI, yes these frames are at least 60 years old but even if they weren’t missing the glass and backs they are not high quality vintage pieces, the wood is cheap and in terrible condition. I’m not wrecking some heirloom quality wood frame in this project, I promise!)
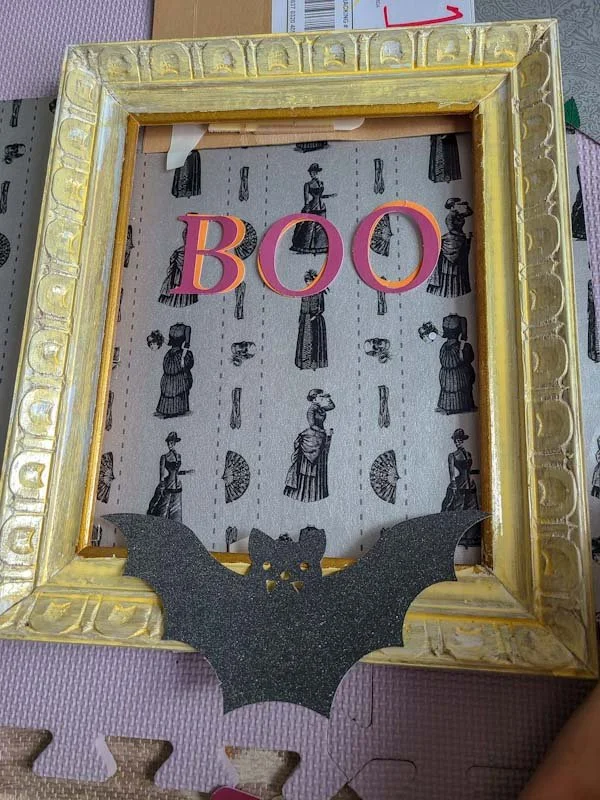
Before I got down to rehabbing the frame, I did some testing to make sure my idea for the art design would work. In addition to the wallpaper, I wanted to use some precut paper letters I had on hand (I bought a huge pack of these in two fonts and a full spectrum of colors more than 15 years ago when a local craft store went out of business and I love finding projects for them)
My test layout (and the grungy yellowed frame).
I also had a couple of pre-cut bats in black glittery cardstock – these came in a Paper Source kit I used for last year’s Halloween decorations (black cats in Halloween costumes) If you don’t have precut items on hand, you could absolutely print something off your computer or draw and cut it yourself out of construction paper. With my materials I quickly mocked up a design I was happy with.
Then it was time to tackle the icky yellowed frame. Because of the varnish I decided to do a quick sanding just to rough up the finish a bit so it would hold the new paint better. Then I covered it in two coats of gray chalkboard paint. I picked this paint in part because it was the only gray paint I had on hand, but I also liked the idea of a more matte finish.
Just as further evidence that this is not a high quality wood frame, the wood was so rough in spots it actually started tearing chunks out of my foam brush in the first coat! So I switched to a brush for the second coat (and to also help me get into some of the awkward nooks and crannies).
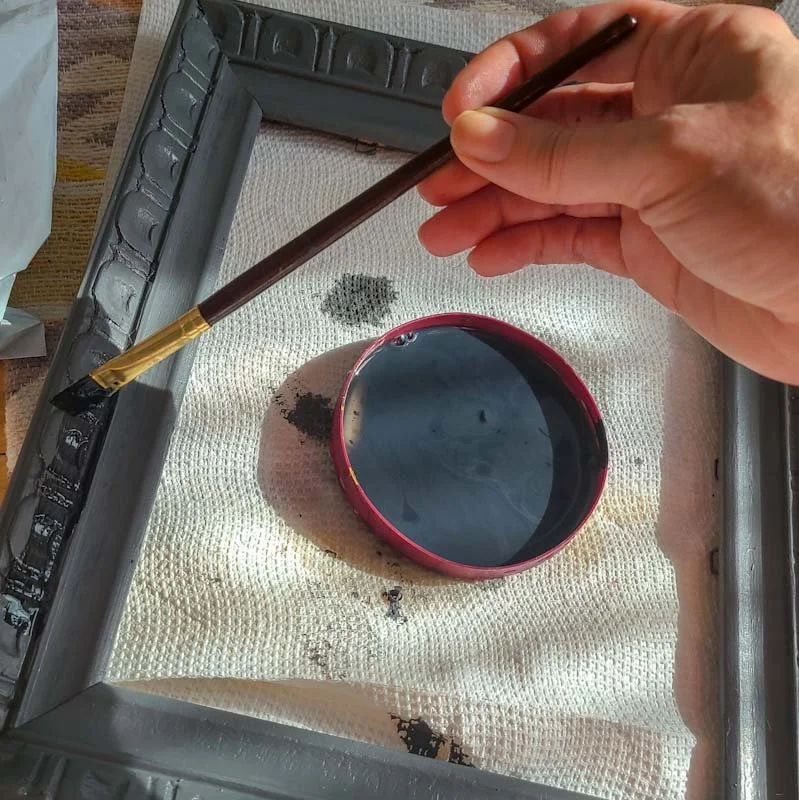
When the gray had fully dried, I did a wash of diluted black paint (also chalkboard paint but it worked just fine) just to bring out a little bit more of the unique texture on the frame. If you’ve never done a wash before, dilute your paint with water (stir it together really well), brush it generously on to a small section of the frame and then immediately wipe up the excess with a rag or paper towel. This technique works best when there’s a lot of texture on your object because the paint will stay in the small nooks and crannies when you wipe the rest off.
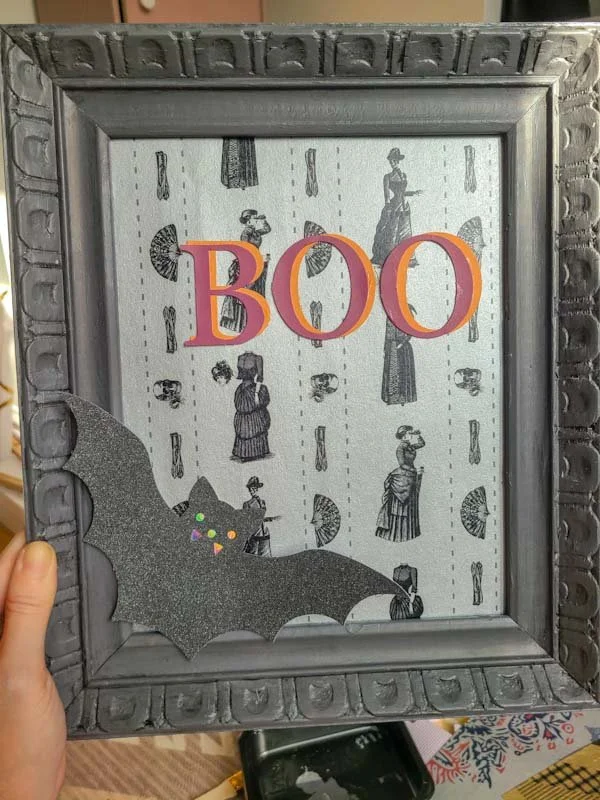
With the frame done, assembling the art was fairly simple. I cut the wallpaper to size and glued the letters on with a little bit of mod podge. I highly recommend using a ruler to help you keep the letters evenly spaced and on the same line. I wanted a two tone effect so the orange letters went on slightly off-center and then the purple letters were glued just offset to the left. I decided to go for a slightly three dimensional effect with the bat so I folded his wings in slightly and glued him where he draped over the corner of the frame.
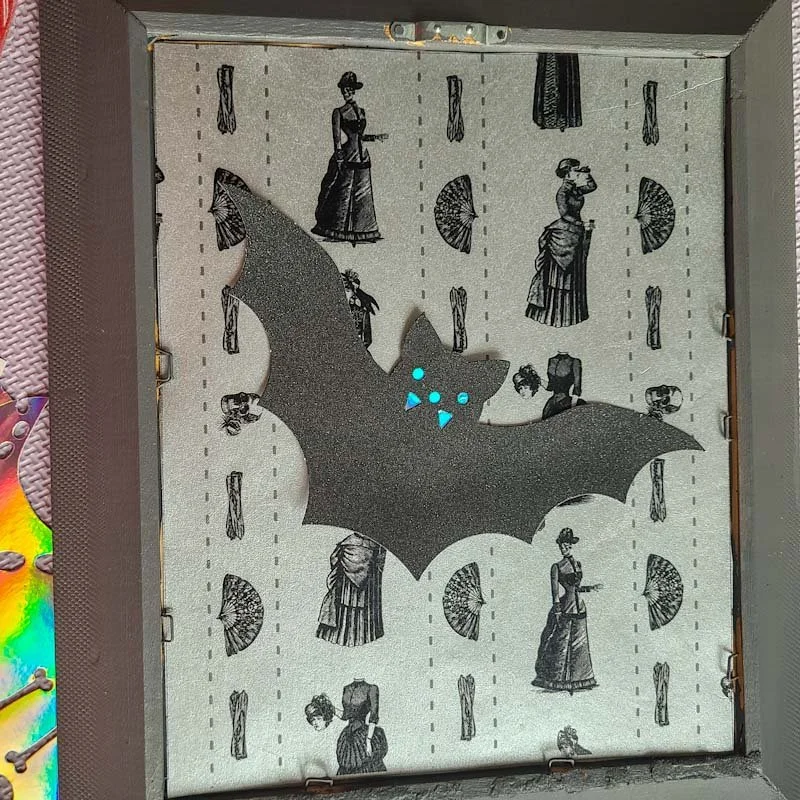
As I was cutting the wallpaper out, I realized I had plenty left to cut an additional rectangle, and remembered that the door I was planning to place this on has a full glass pane, which means we’d see the back of the frame regularly – and if you recall the original back of the frame was actually missing and had been replaced with a random piece of cardboard from some old packaging. So I decided to cut another piece of wallpaper and glue my last remaining glitter bat to the back so that we’d get to enjoy the décor even from the backside of the door.
Our front door already has a hanging nail in it put in by the previous owners, so I did a quick test to see how it looked. I will need to do a little work on the hanging mechanism for this piece – I tested it with some scrap yarn, but I think looking for some fun Halloween ribbon would be nice. But overall I’m very happy with it! If you had a frame you didn’t need to paint you could easily do this craft in an hour or two; since I had to let each coat of paint dry it did take me a couple of days to finish, but I probably spent no more than three working hours on this project in total.
If you didn’t have a door to hang this on, you could also hang it on a wall or (if you had a frame with a proper stand back) set it on a shelf or any cabinet or counter where you display seasonal décor. And obviously this isn’t limited to Halloween! I really love the idea of this framed art as an alternative to a door wreath, and you could easily adapt this to any season or find a lovely wallpaper with a print that suits your style and make an every day “Welcome” or “Hello” art. Might I suggest some of the options in my Spoonflower shop ?

