Procrastination Proof Crafts: The One Day Halloween Candy Bucket
Procrastination Proof Crafts is a series focusing on simple seasonal crafts that can be done in one or two days, for all of us who save a ton of holiday craft pins on Pinterest and then wait too long to start them.
Welcome to Procrastination Proof Crafts! If you’re like me you are really good at saving all the “Summerween” and “Christmas in July” posts for their seasonal craft ideas …. and then you wait so long to start them that you’ll never finish them before the holiday. In this series, I’m going to focus on projects with minimal prep and which only take 1 to 2 days to complete, so you can absolutely wait until the last minute and STILL get them done in time.
We’re kicking things off with a Halloween candy bucket that I made on October 29th last year, so I know this is truly procrastination proof.
Last Halloween was the first one of my entire adulthood that I was able to hand out candy – living in apartments in NYC does not really lend itself to traditional trick or treating. But we knew there were tons of kids in our new Chicago neighborhood and my husband and I were really looking forward to the end of October. We knew Halloween was serious business when we went to buy candy and a bucket three days before Halloween — only to find an almost empty seasonal section at the store (the staff were literally setting out Christmas items as we shopped). There were no candy buckets to be found and the candy supply was already pretty picked over. So we ended up purchasing the best candy assortments we could find and this nice plain metal bucket (intended for cleaning supplies according to the label).
I knew the instant I saw the plain white bucket how I wanted to decorate it. As a Spoonflower designer, I order swatches of any new designs I put up for sale so I can quality check them and make sure they are printing the way I intended. And since I have an extensive Halloween fabric collection, I have a lot of Halloween themed 8x8 inch swatches sitting around in my stash. These seemed like the perfect options for decorations.
All you need for this craft is a bucket, fabric scraps, mod podge (or another kind of glue), scissors and a paintbrush you don’t care about getting covered in glue.
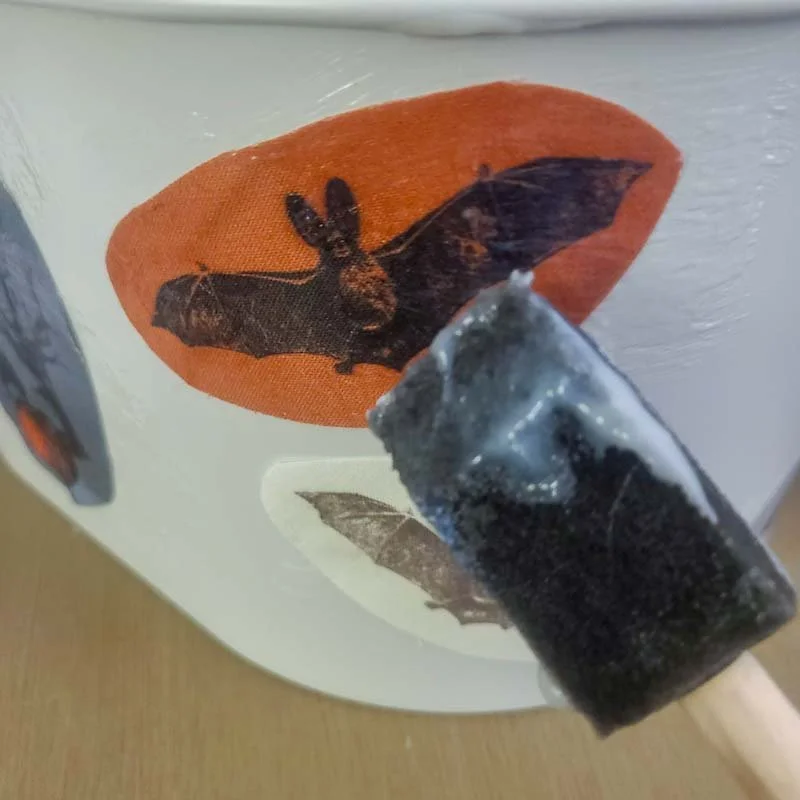
After getting a look at the fabric, which is largely toile-inspired, I decided to cut out individual groups of the toile figures from each fabric and arrange them on the bucket to create a design that went all the way around. I grabbed my jar of Mod Podge and started pasting. The best technique seemed to be to put a dab of Mod Podge directly on the bucket (I used a paint stirrer for this), place the fabric over the dab and then use a foam brush to cover the entire front of the fabric, focusing on sealing down the edges. This got messy, so be sure to use a covered surface. Also I intentionally picked a foam brush for the Mod Podging that was already pretty well used since I (rightly) suspected the glue would end up ruining the brush.
First row, cutting the fabric patches and dabbing the mod podge on the bucket for placement. Directly above, sealing the fabric to the bucket with mod podge.
Once I had everything placed where I liked it, I also took a damp cloth and tried to clean up any of the glue that had spread out on the bare surface of the bucket, just to make things look a bit neater. (I’ll be honest, this didn’t work great, but at least the Mod Podge dries clear.)
And after taking overnight to dry, our candy bucket was all finished!
This bucket isn’t huge but still held about one large assortment bag worth of candy.
If you don’t have Halloween fabric in your stash, you can either order swatches from Spoonflower or check craft or fabric stores for Halloween themed quilting packs. You could also experiment with peel and stick wallpaper (although if your bucket has a lot of rounded edges it might be hard to get larger segments covered without some wrinkles). But this is so quick and easy you have plenty of time to look for your materials!
We actually had a great time handing out candy even though this is what happened on the afternoon of October 31:
Yes, that is a pretty heavy snowstorm (we’d end up getting about three inches of snow).
The snow had stopped falling by evening, and it really didn’t seem to deter the kids at all – we initially worried we’d bought too many bags of candy (we had four large assortment bags), but we only had half a bag left at the end of the night.
Do you hand out candy where you live? Would a bucket like this work for your treat wrangling?


