
Mending Lab: Testing out Sashiko Embroidery, Part 2
Welcome to Mending Lab! In this series I explore techniques for mending and/or upcycling clothes and/or fabric housewares. While we’ll focus mostly on visible mending techniques, we’ll also look at simple alterations that can upcycle an item you never wear or use into one of your favorite possessions.
If you’re just finding this blog now, make sure you read Part 1 for the list of materials I used. As a reminder I’m following instructions in the book Essential Sashiko from Boutique-Sha, an English translation of a Japanese sashiko book (Sashiko No Monyo To Komono). You can purchase it through Bookshop.org here (that’s an affiliate link, so I do get a small amount of money if you purchase).
When we left off, I was about to attempt a pattern featuring curved lines. The book’s advice was to use smaller stitches than with straight lines and to stop loading stitches on the needle when it became difficult to navigate the curve. This advice served me very well – for the most part I’d load stitches from the midpoint of one curve to the midpoint of the next.
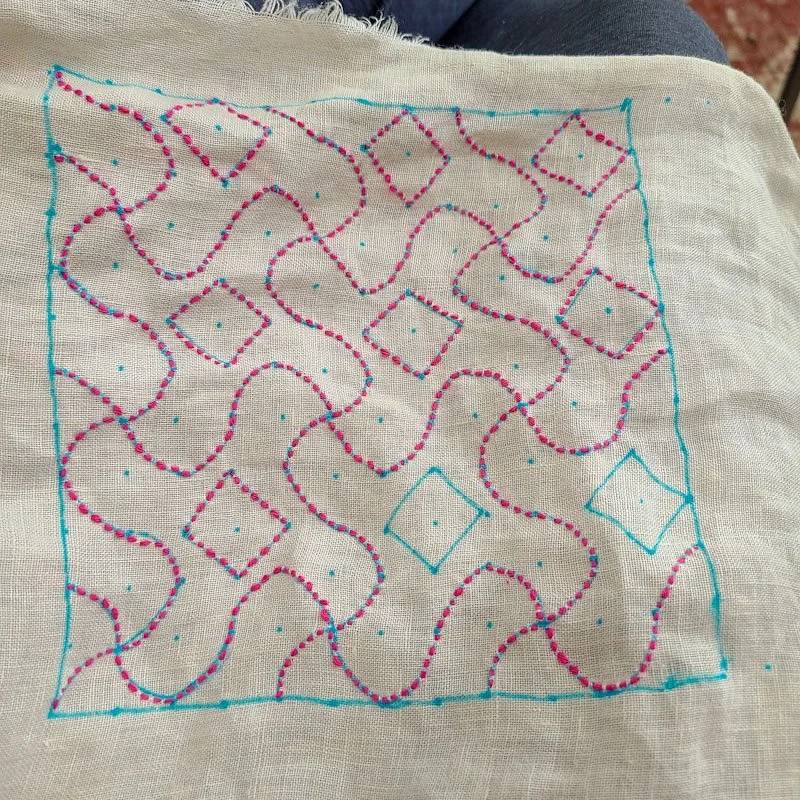
Most of my curved lines came out okay.
After finishing that square, I added a couple of “standalone” motifs – these are non-repeating motifs meant to provide smaller areas of embellishment. For these, I still followed my previous method from the previous post, setting up a grid with dots from the water soluble fabric pen and then drawing the motif on the grid. One of them featured diagonal lines that intersected halfway between the dots, so I used my quilting ruler to keep things as straight as possible.
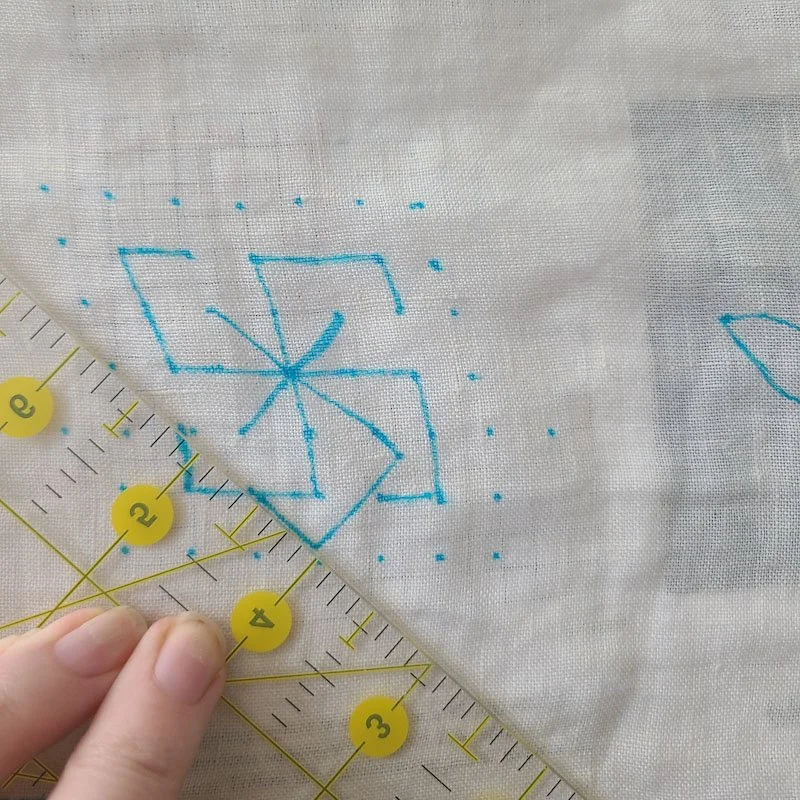
As you can see here, one of the trickiest parts was just trying to keep the linen fabric grain square!
I learned quite a few things about sashiko in this project! I was pleasantly surprised by the fact that while the motifs look best when you can keep the stitches even, there is a little bit of leeway, and you don’t have to be perfectly even to get a nice look. I will note that I did get a little too large with my stitches a couple of times, which does cause the stitches to pop out away from the fabric a bit.

You can see here how those two circled stitches aren’t laying along the fabric quite as nicely as the others.
I also struggled a bit with the corner technique – the book advises you to not stitch all the way into the corner and instead stop a bit short. This creates an optical illusion that the corners are even and sharp. I had a hard time getting the spacing right on some of the lines (you can see both good and bad corners in the photo above) and so my corners aren’t always super crisp, but I will keep practicing!
I was also surprised by how quickly the motifs stitched up – I finished the entire curved motif square in about 90 minutes. This gave me hope that my ultimate project, adding sashiko to my linen pajama set, is something I can actually complete this summer instead of becoming a multi-year project.
I also realized that sashiko is a very efficient use of thread! Because the stitches are basically running stitches, you aren’t doubling back the way you would with other types of embroidery stitches. By the time I finished the entire bag, I had used maybe half of ONE skein of blue sashiko thread and maybe one third of one skein of the pink. I’m starting to feel more optimistic that 6 skeins of each will be plenty for the pajamas.
Once I finished stitching, I rinsed the entire piece of fabric to remove the marking pen and was really pleased with how it turned out (yes one of the squares got put on kind of wonky but as you’ll see it won’t really matter in the final bag).

It was here that I ran into my only problem with my sashiko book. I started to assemble the linen into the drawstring bag (along with a lining of quilting cotton I had in my stash), but I could not for the life of me figure out the below diagram:

Given that you were supposed to cut a long strip of fabric and fold it in half from top to bottom, there shouldn’t BE a seam in the middle of the piece to “press open.” Additionally I cannot explain why the gaps for the drawstring casing are down by that middle seam instead of by the top edges. I do know that Japanese sewing patterns, like knitting patterns, have an official standard for how the diagrams are written and I wonder if whoever translated this into English misunderstood what they were looking at (perhaps reading a fold line in the middle as a seam?). They could have used a tech editor on this one, that’s for sure!
I’ve sewn drawstring bags on my own plenty of times, so I just abandoned the instructions and sewed it together myself. I used a zig zag stitch to attach the lining to the linen, right sides together (hoping to reduce some of the fraying), leaving a gap for the drawstring casing and a larger one on one side to turn it right side out. Then I hand sewed the turning gap closed with a whipstitch and machine sewed the sides of the bag together, making sure to skip over the inside of the lining at the top so the drawstring could get through. For the drawstring, I used a sturdy piece of felt backed canvas that came as a packaging tie on a recent furniture purchase, but any kind of cord would have worked. And then I had a nice bag to hold my sashiko supplies!


This is my first completed sashiko project, but I’m sure it will not be my last. I’m still thinking through what motifs I want on my pajamas, but I’m really excited to get started on that project next!
Did this project inspire you to try sashiko? Have you tried sashiko in the past, and what did you think? Can you figure out what the heck is going on in that sewing diagram? Let me know in the comments!
Never miss a blog post - sign up today and get a monthly digest of all recent posts straight to your inbox!


I’m Whitney, a tech editor, graphic designer, and lifelong crafter. Join me for an exploration of my latest knitting, crochet, sewing, and upcycling projects, tips on knitting technique, editing tips for knitting designers, and more!