
Upcycling an Unloved T-Shirt Into a Running Tank (No Sew Method)
I got back into running a few years ago (I come from a family of distance runners but hadn’t really run seriously since middle school), and while I could write an entire essay just on how running has benefited my mental health in addition to my general physical stamina, the one thing I had not missed about a regular athletic practice is the constant cycle of laundry. While I am mostly simplifying and paring down my wardrobe in regular day to day wear, running outside three times a week requires a packed drawer (and it’s a big drawer) of tops reserved just for running in any possible weather. I’ve also discovered that just any old T-shirt really won’t work for me – it needs to be big enough that it hangs loose from my torso (I find shirts/tanks that rub across my hips and stomach when I run really annoying), not have too high a neck, and have shoulders with enough ease that I can pump my arms freely.
I have about half a dozen T-shirts that meet this standard now, but I also have at least half a dozen more that I have dumped into the running drawer but only wear if all the “good” shirts are dirty. Most of these are just a bit tighter in one area than I would like, or maybe the fabric is a bit stiff (a LOT of these are cheap event staff shirts from a former employer). I don’t want to just toss them but right now they all mostly just take up space in my drawer.
However, the first summer after I started running again I treated myself to a running tank top from Senita Athletics that I absolutely adore – and which they seem to have discontinued. My favorite part of this tank is its split back, which allows the fabric to hang loosely around my hips and stomach but also lets airflow in through the back (a very nice perk on hotter running days). It doesn’t show anything I’m not comfortable showing in public but also helps me stay cooler. And after looking at its construction carefully, I found myself wondering if I could cut one of my unloved running t-shirts into a similar shape. I was particularly interested in whether I could do so with minimal or no sewing.
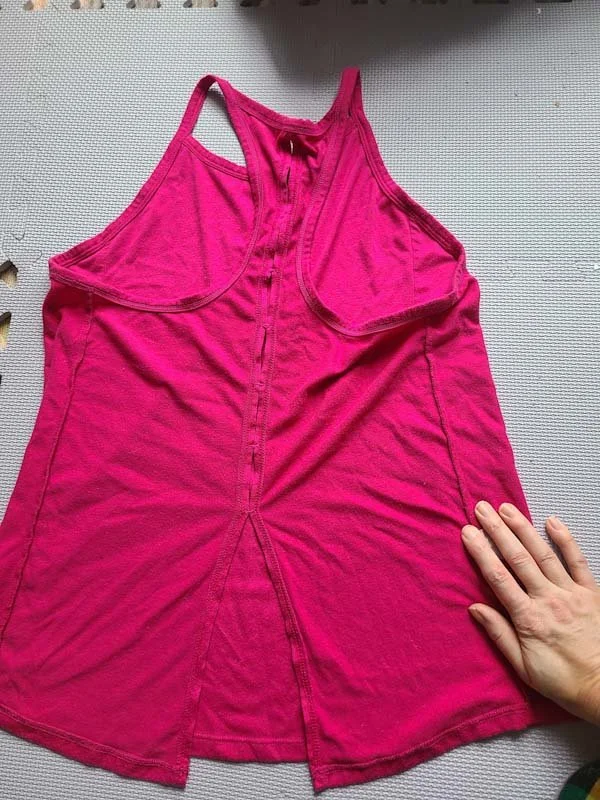
The original Senita Athletics top (inside out)
I pulled one of my least loved running t-shirts out of the drawer – this one is a bit longer than an average t-shirt and is tighter on my hips then I would like for running. Also I don’t love the way the sleeve fabric feels on my arms. An excellent candidate for a cut that should alleviate both those problems!
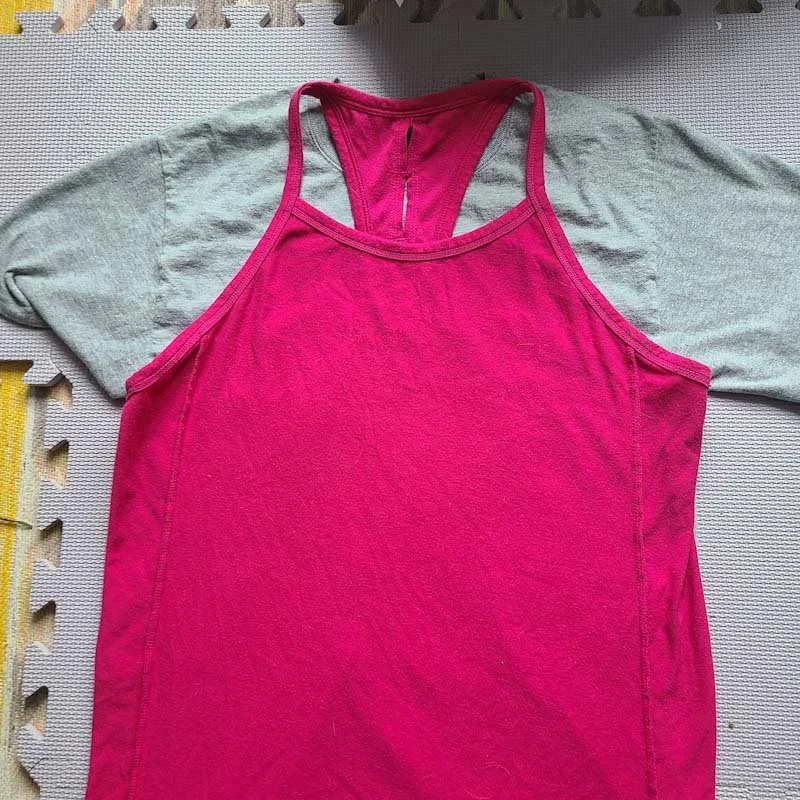
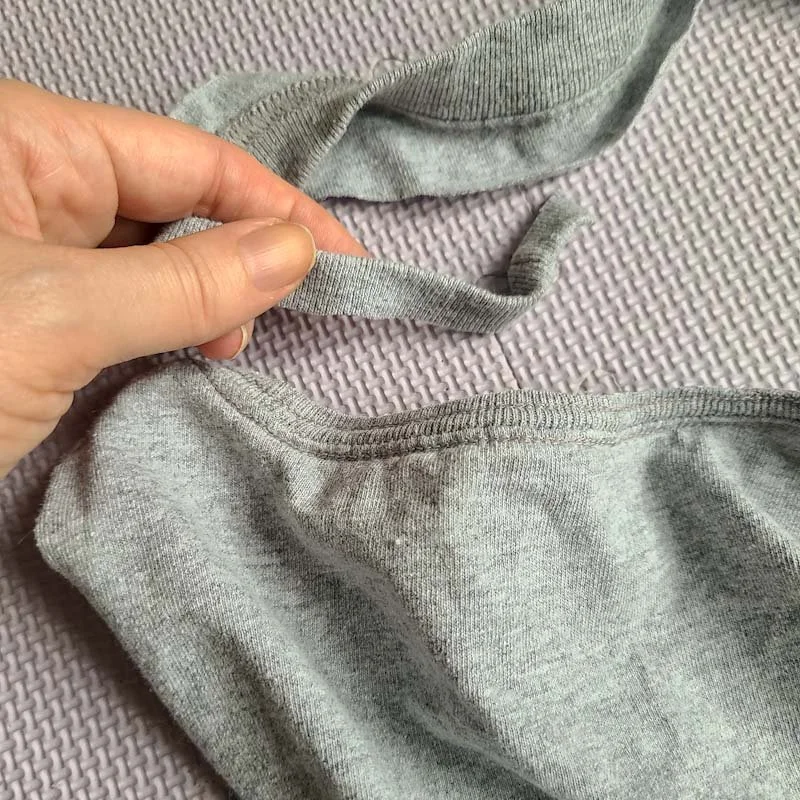
I started by laying out the pink tank on top of the T-shirt. One of the things you may have noticed about the tank is that it does have side panels to give a bit more width. In laying out the two shirts together, it seemed like the T-shirt was the same width as the tank even without the side panels, so I thought I could get it to work without adding those in. Using a water soluble fabric marker, I traced out the armholes of the tank on the T-shirt. I did leave a little extra ease on the top straps; I knew the jersey fabric would curl in on itself so I needed a wider fabric to get a finished version closer to the tank. I actually only needed to trace the armhole on one side of the shirt, then I folded the T-shirt in half so I could cut both armholes the exact same.
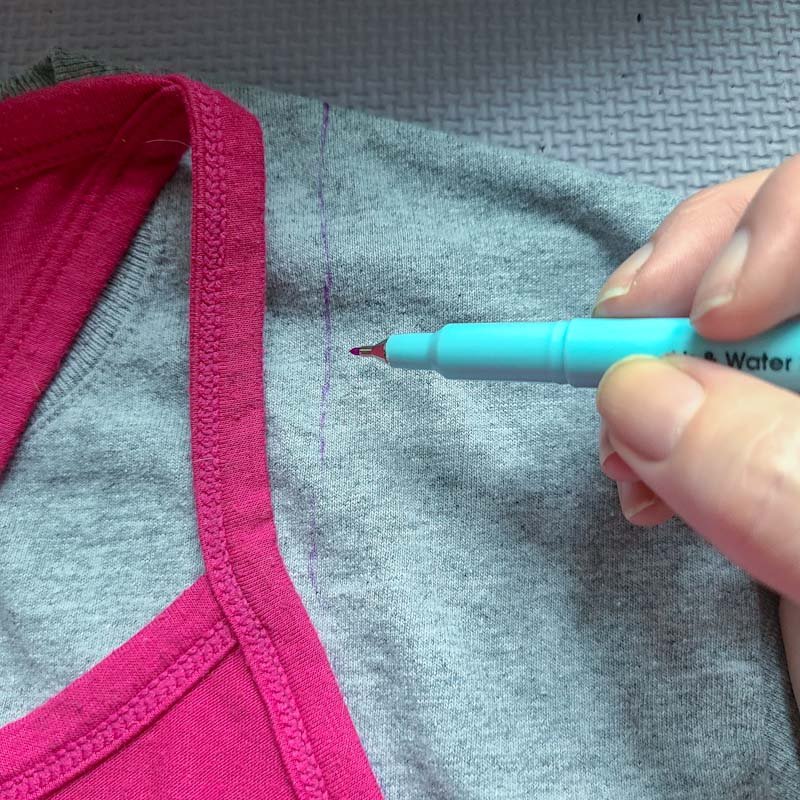
I left a little extra space for the strap here…
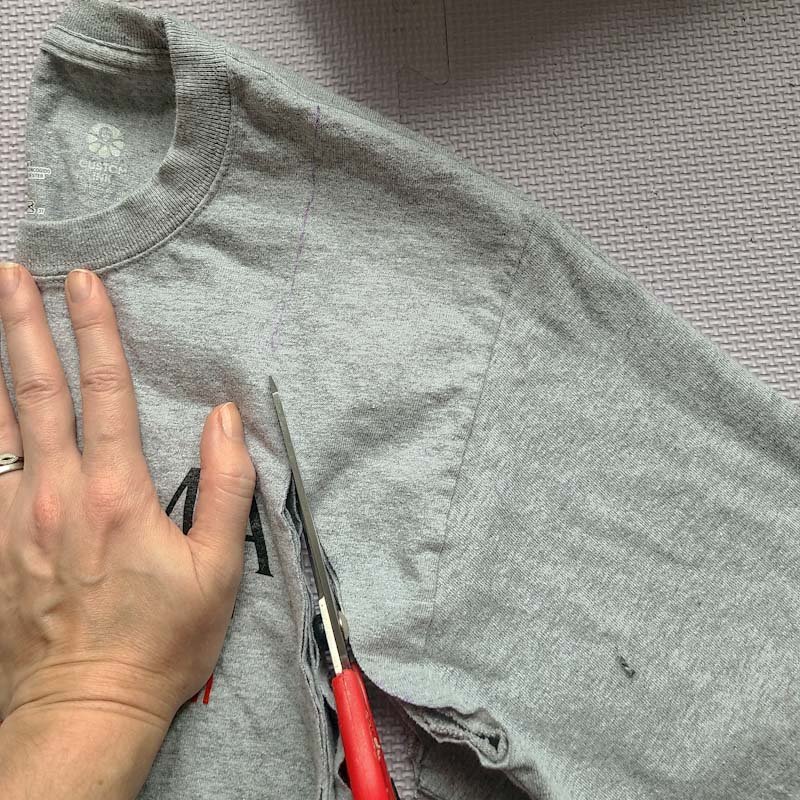
and then I cut the armhole (both layers at once).
I then traced the neckline of the tank on both the front and back of the T-shirt and cut that out – the tank comes up pretty high at the back, so for a little extra stability on the back I only cut the neck ribbing down to where it is sewn on to the T-shirt.
Cutting away the back neck, but leaving the seam for extra strength.
Finally, I folded both the T-shirt and the tank in half lengthwise again, and marked where the back splits occurred, then cut those as well.
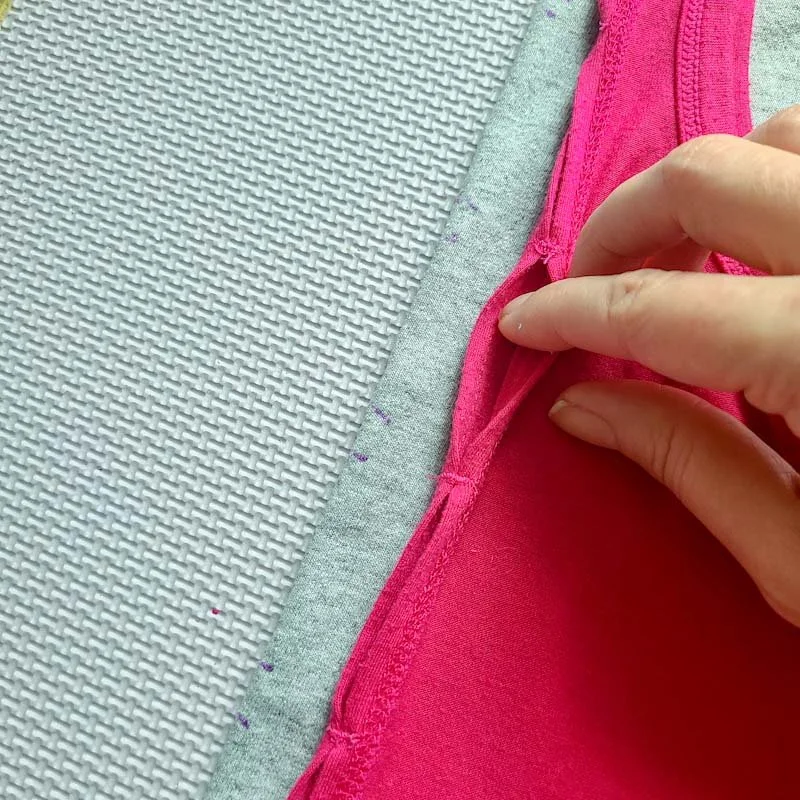
The purple dots on the T-shirt line up with the edge of each opening in the tank.
In my first try on after all the cutting, I realized that because the T-shirt is a little longer and lacks the side gores of the tank, the split at the bottom of the tank needed to come up a bit higher to give me a little more room on the hips. This was easy enough to fix by cutting up to the lowest of the back holes and letting it open fully.
In looking at the finished product, I did see a few places where sewing might add a little strength – the straps could be folded in on themselves and sewn down (which is how the tank is constructed), and adding some stitching at all the points on the back between each split could help as well. But I wanted to see how well (or how long) this no-sew version would hold up when I actually wore it to run in.
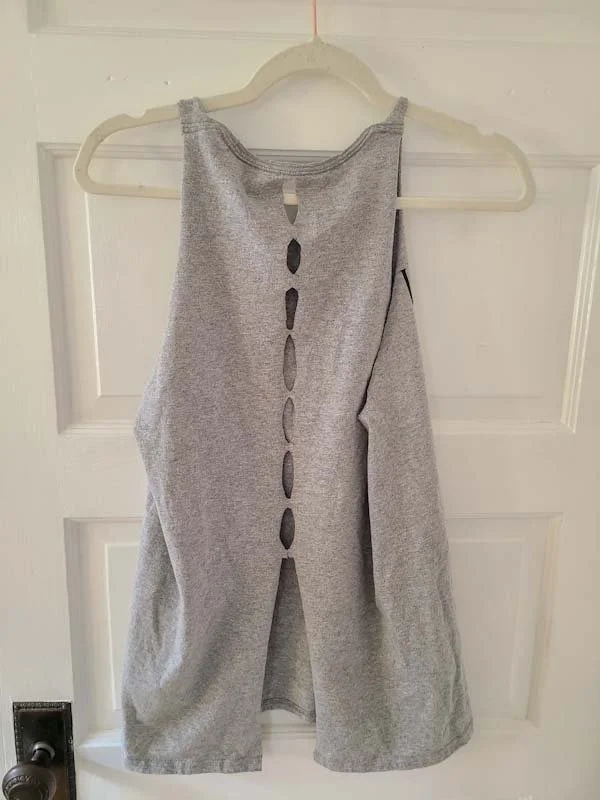
The finished duped tank from the back.
And now a twist: I actually drafted and photographed this post over a year ago! I decided to hold off posting this project until the tank got some real-world wear, in case I needed to reinforce it with sewing after all. I wore it several times last summer, and while I still like my store-bought tank better (it’s softer material and a more fun color), my me-made tank has held up really well with no sewing reinforcement. I’m planning to convert a few more of my back-of-the-drawer T-shirts to running tanks this summer!
Have you ever done a no-sew upcycle with an old T-shirt? What did you make?


I’m Whitney, a tech editor, graphic designer, and lifelong crafter. Join me for an exploration of my latest knitting, crochet, sewing, and upcycling projects, tips on knitting technique, editing tips for knitting designers, and more!