Just for Fun DIY: The Sticker Trunk of my Adolescent Dreams
Sometimes I have an end goal in mind when I do DIYs – to learn a new skill, to try a new product, to make something I need – and sometimes I just want to mess around with my craft supply stash and see what I can make. This is a Just for Fun DIY.
I was in junior high and early high school during the grunge/skater culture fashion trend of the mid 90s and though my own personal fashion never went that far in that direction (aside from a love for flannel shirts that persists to this day), I did love the plastered-in-stickers aesthetic that you’d see on skateboards, signs around skate parks, and often on the book covers and lockers of the skater kids at my school. But the music I was into at the time was not the kind of acts for which you prominently displayed stickers, and as a nerdy, soft-spoken girl I was not the kind of kid that was going to put weed leaf stickers or anarchist symbols on my belongings to seem edgy.
In recent years, however, stickers have become more available in any aesthetic and attitude you could possibly desire, and I’ve slowly been building up a collection of stickers from friends, small businesses, craft fairs, and, most significantly last year, from winning a box of stickers in Beryl Shereshewsky’s charity raffle.
It was this last acquisition that made me start thinking about what I could *do* with all of these stickers, which mostly just hang out in a box. I realized I really wanted to just plaster some object in a sticker collage, but it would need to be something that would 1) look cool covered in stickers, not just messy, and 2) be something I’d see and/or interact with on a regular basis. And then I thought of my plaid storage box.
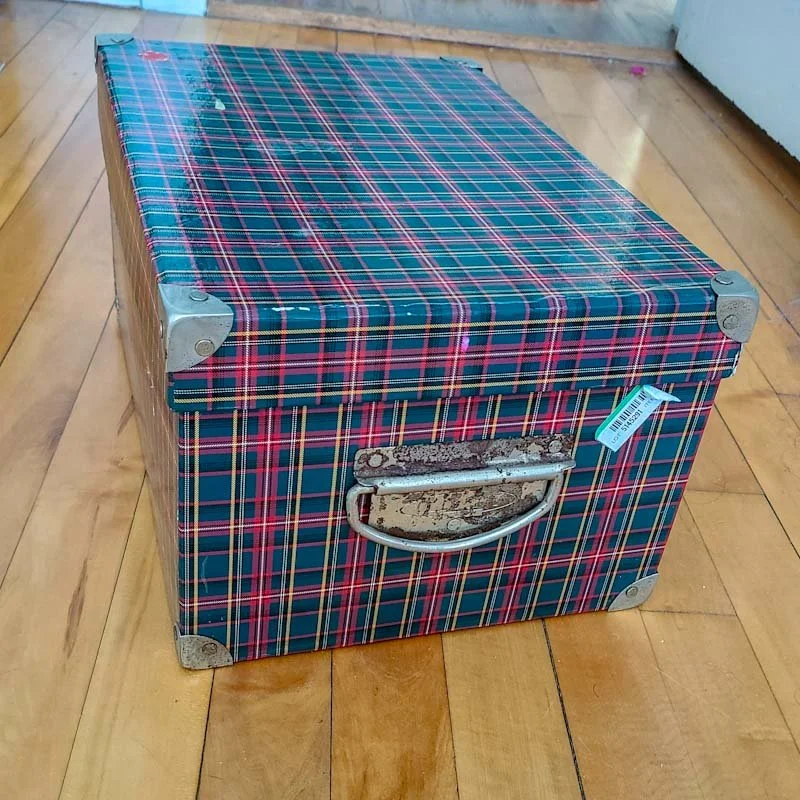
The trunk, showing every minute of its 25 years of holding stuff.
This box originally held a Christmas gift for one of my brothers back around 1998 or 1999. I can roughly pinpoint the year because when I went back to college after Christmas, I used the box to safely transport my own Christmas gifts back to my dorm (I lived three hours’ drive from my undergraduate college so the box needed to be sturdy, but not air travel sturdy). From then on, the box became storage for any number of small items for which I needed easily accessible, closeable storage, following me from college to New York and finally to my current home in Chicago. For many years the box lived in a series of tiny apartment bathrooms to provide extra storage, which is why the metal corners and handles are now a bit rusty; over the last five years or so it has moved into my primary crafting space and become the storage for my Spoonflower shop test samples, including the color map I use to make sure the colors of my designs will print the way I want them to on actual fabric. So not only do I still use it regularly, it could really use an aesthetic makeover. Perfect.
My first step was to try to remove some of the rust from the metal corners and handles. This would have been easier if I could have removed the handles from the box and put them into a bath of rust remover, but unfortunately that was not an option (they had all been attached with some kind of brads that had been sealed tight instead of a screw or nail I could have removed and replaced). I first tried a scrub of baking soda and water, which I would not recommend – it got only a small portion of the rust off and I was still shaking dry baking soda out of the crevices of the handles weeks later. I ended up getting most of the rust off with a steel wool pad (the type that comes with cleaning powder already on it). There were still some parts I couldn’t get fully clean, though, so it was clear I’d have to paint the metal parts and not just shine them up.
For the painting I turned to one of my favorite craft hacks for metallic paint – nail polish! Cheap drugstore nail polish is basically enamel paint, so it wears better on metal or plastic than acrylic, and if you only need a small amount it’s far cheaper to buy a bottle of nail polish than pay for a specialty paint at the craft store. I used an old bottle of Maybelline “Color Show” polish in Bold Gold – the polish line still exists (although at a higher price point than I remember), but I’m not sure if they still have this exact shade. It needed a couple coats plus a very cheap clear top coat for extra protection, but it looked so good afterwards that I found myself wondering if the metal parts had originally been gold and just faded over time.
[Above, the first coat on the handle, and the second coat on one of the corners.]
Now it was time to spruce up the trunk itself. Because I already had all the supplies in my stash from previous projects, I opted to use Fusion Mineral Paint. Fusion makes a primer coat designed to help their paints stick to laminate and plastic surfaces, which I had in my stash from a previous project. Plus I had a little sampler bottle of a teal blue shade that I thought would make a nice background for my stickers.
I will note that I’d had the sampler bottle for about 3-4 years and it had thickened a bit, so you will see that the coat of paint itself has a lot of texture in it. That was fine for this project – the outside of the box already had lots of wrinkles and dents from years of use so it was never going to be perfectly smooth – but I probably wouldn’t have been happy with the paint on a piece of actual furniture. In the future I will make sure if I order a sampler bottle I use it in a few months or give it to someone else. (I do also think this being a sampler was the main issue here as the seal on the cap seemed to have come a bit loose– I have a full size bottle of a different color with a much sturdier cap and it’s still fine.)
I put on the primer, two-ish coats of the Fusion Paint (it didn’t need two full coats but it did need touch ups in places after the first one), and then Fusion’s Wipe-On Top Coat, just to give a little extra protection, since I do move this box around a lot and open and close the lid frequently.
[Above: the primer, first coat, and top coat applications, as well as painting the top border of the interior]
I had initially planned to line the interior of the box with peel and stick wallpaper, but the blue actually complimented the plaid interior better than I expected, and the interior of the box is still in pretty good shape, so I decided to just paint over the top edge where the glossier paper from the outside was folded over, and save the wallpaper for another project.
Once all of that dried, it was time for the fun part: the stickers! I ended up using about 60 percent of the batch I collected. The stickers I won from Beryl were mostly food oriented (as you might expect from a cooking YouTuber) and I did end up using those selectively so there was a wider variety of topics represented.
My sticker collection after some sorting (the right most pile were the stickers I was definitely using, the left side was maybes, and the top most was probably not — although I did end up using a couple of them).
I used all of the largest stickers and then filled in gaps with smaller ones. I didn’t do a ton of overlapping in this pass, because I’d like to have space to add in new stickers as I collect them. I also didn’t put stickers under where the edge of the lid sits, but that may change later. The vinyl stickers stuck by far the best (which makes sense as they are designed to stick to non-plastic, not perfectly smooth surfaces like water bottles and laptops); some of the paper stickers seemed to have trouble sticking to the paint and have been curling up at the edges. I’ll probably save the remaining paper stickers for sticking to birthday card envelopes and other paper projects.
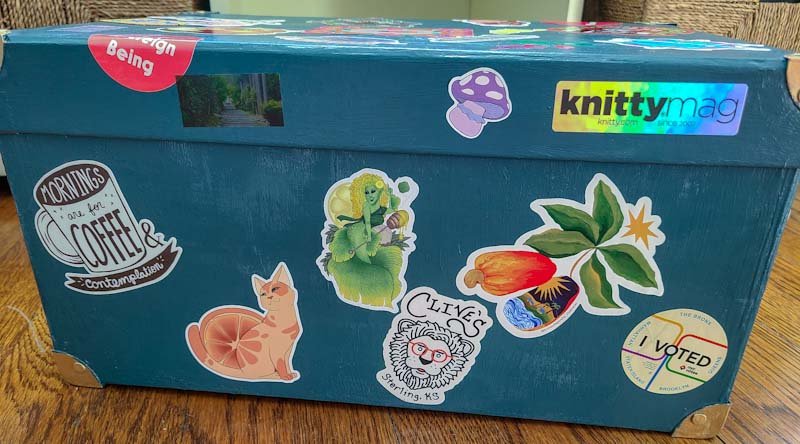
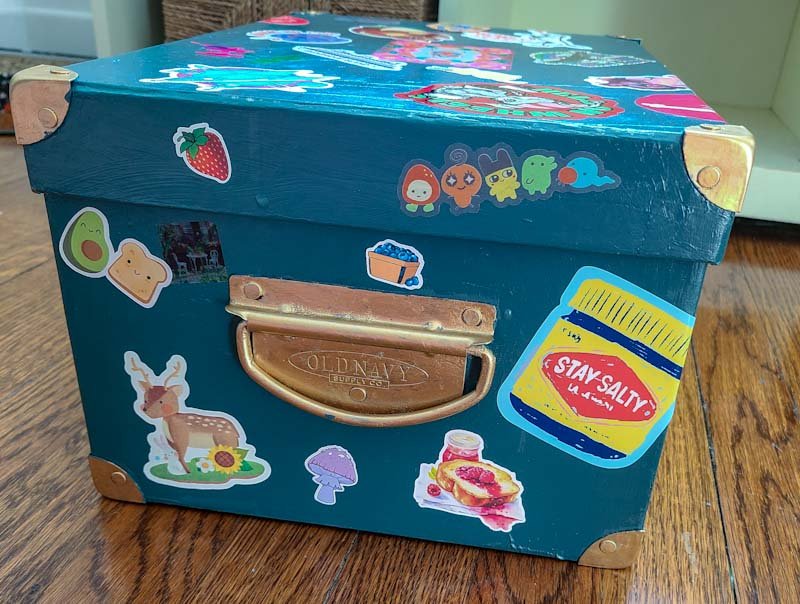
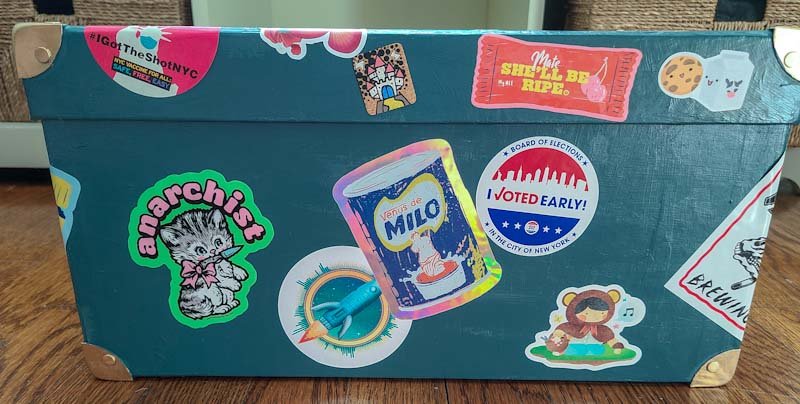
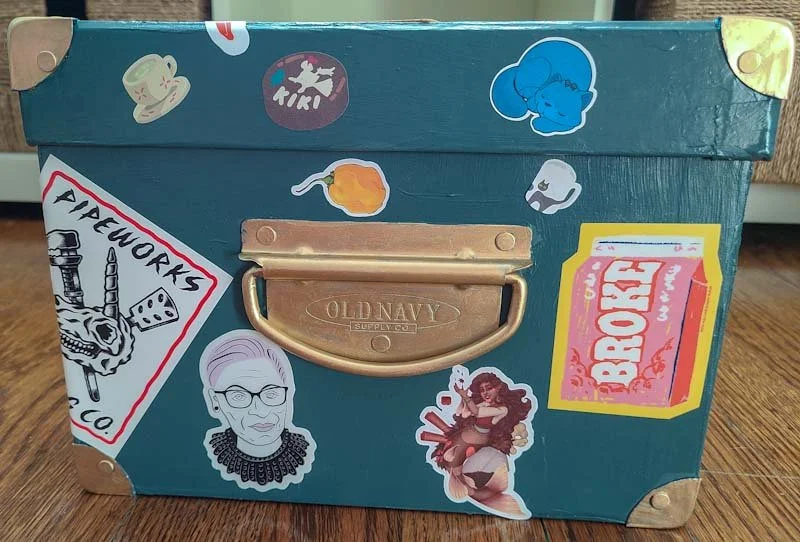
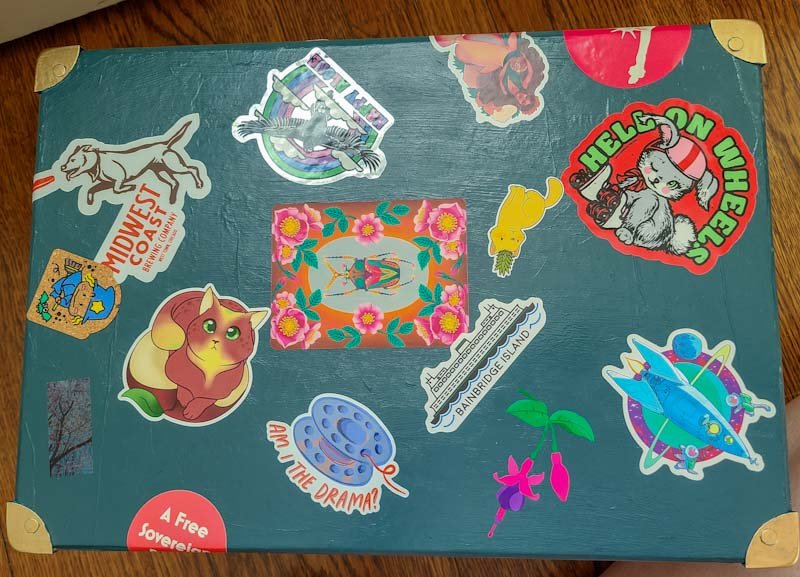
[Above: a slideshow of each side (and top) of the trunk, covered in stickers.]
I’m so happy with how this came out! It did take a while because of the various stages of cleaning and painting (and letting everything dry properly between each stage), but it was a minimal effort for a final product that makes me happy every time I look at it.
Are you a sticker collector? How do you display your stickers?

